Interested in becoming a NO Days Featured Artist?

Interested in becoming a NO Days Featured Artist?


Want to share your artwork made using NO Days products with the world? We want to help you promote your work! We love seeing the various ways artists are using NO Days products! We share our Featured Artist spotlight with our newsletter subscribers, our Facebook friends and fans, on our Featured Artist Page and right here on our blog, linking back to your website.

Simply send an email to info@nodaysadhesives.com with the subject: Featured Artist. Be sure to include your name, email address, and website (if you have one) along with a brief bio and pictures of yourself and your artwork made with NO Days Products. Not sure what to include in a bio? Tell us how you became interested in playing with glass or crafts. How about where you get your inspiration? Oh! And don't forget to tell us why you love using NO Days!
Showing posts with label fused glass. Show all posts

Thursday, October 30, 2014

No Days Road Show ~ Margie's Art Glass Studio, Minot, ND

Margie serves up the best coffee in town!
Welcome to Margie's Art Glass Studio in Minot, North Dakota ~ the cutest little gathering place ever! Margie's boasts not only unique, handmade, one-of-a-kind gifts for the discerning gift-giver and collector, but also The Black Iguana (best coffee and smoothie bar offering vegan, vegetarian and gluten-free options) and the best art making experience around!
Margie's Art Glass Studio has lots of wonderful and unique gifts.
 After you're done perusing the artwork and finding inspiration, head on downstairs to the creation stations...
Welcome to the No Days weekend at Margie's Art Glass!
 Have a seat at one of the tables in the Ceramic Cafe, find the project you'd like to work on and start creating! Oh, did you forget to grab a drink or a snack upstairs? No problem! The lovely hosts will take your order and bring it to you so you can stay focused on your artwork.
Margie's Art Glass has a paint your own pottery section, too!
 There was so much interest in the No Days classes taught by instructor Carrie Strope that extra classes were offered and everything SOLD OUT! What a wonderful and busy weekend we had.
Working on getting the perfect frit leaf using
No Days Liquid Fusing Adhesive.
 Carrie showed students how to use No Days Groutless Mosaic Adhesive to create simple glass on glass (GOG) mosaics, how to layer dichroic glass to create depth and interest in fused glass jewelry (using HoneyDoo Zuper Glue), how simple it can be to work with frit using No Days Liquid Fusing Adhesive, and how to use all the scraps in your studio to make fused glass mosaics with No Days Thinfuse.
Such a sweet Anniversary celebration;
husband and wife team collaboration in No Days Doodle Plates.
109 Main Street South
Minot, ND 58701
701-837-8555


Friday, November 29, 2013

Oops! Now what?!? Working with frit and No Days Liquid Fusing Adhesive

"Embroidered Dogwood" fused glass plate created with frit,
Glassline paints and No Days Liquid Fusing Adhesive.
The creation of this plate is an epic tale. So grab your preferred beverage, sit back and enjoy the ride!

Clear fusible glass base with painted trace lines done with
Glassline paints.

In the beginning, there was a circle of clear glass and some glassline paints to outline the design...I've been working on a series of floral themed platters. Some of them are very realistic looking, but mostly, I lean towards abstract and lots of color. My aim for this particular plate was to make it look geometric with a sense of needlework. After tracing the outlines of my design from a template to the clear glass base and letting the paints dry (10-15 minutes), I was ready to add details and color with various frits.

Building frit design from the center outward over the
dried paints. Frit is held firmly in place with
No Days Liquid Fusing Adhesive.
When I'm using frits, the size grain that I use depends upon the outcome I'm going for. When adding fine detail lines, I use fine frit (size F2 in System 96 or size 01 in Bullseye). The fine frit allows me to create highly detailed imagery. It is also easy to sculpt with the No Days Liquid Fusing Adhesive. If I have larger areas of my design to fill in, I'll switch to medium or coarse frit sizes and often blend colors, as well as mixing opals with cathedrals. Once I've got my design established, I find a good starting point in the center-ish. This makes it easier to work on your piece without brushing your arms across your design.

Detailed frit designs are added in a circular motion building outward.
I lay down a bit of No Days Liquid Fusing Adhesive, then cover it with frits. I sculpt the frits into the shape I want them to be. It's easiest to work from the inside out (in this case).  By starting in one spot and then working next to it, you've got a wall of frit to support each new addition. I decided to experiment with adding some coarse frit accents in areas (to mimic the knotted stitches in embroidery), and then covering them with fine frit. Here, we're viewing the plate from what will be the front side when the plate is finished. It's helpful to have a mirror to work on, then you can see what the front side of the plate looks like as you're working without having to lift the plate overhead.

Checking the progress, looking up at the underside.
If you build on a mirror, you can check your progress as you work.
Although there are no trace lines outside of the flower in the center, I wanted to continue building in a pattern around the edges. Each new color got placed and sculpted until I reached the edge...

The design is nearly finished! And then...
Super close to being finished, and can you believe that it still hasn't occurred to me that I'm working with "enemies"? Wait, what?!?

A picture of the finished frit design before firing in the kiln to
burn off the adhesive and save my design...hopefully.
Yea! It's all finished, and about this time I realize that I've used a piece of 90 COE clear base with 96 COE frits. This is one of those projects that sat in my studio for a few months after being painted before I was able to get to it and add frits. A great lesson in keeping an extremely well organized studio if you plan on firing glass in the kiln. Either stick with one kind of compatible glass, or segregate your pieces from step one! 
So, now I'm left with a beautiful mosaic platter. I could have left it glued together as a flat piece and the No Days Liquid Fusing Adhesive would keep it glued together for good. But, that's not the intention I had when creating this plate, so it's time to trouble shoot. And, admittedly, that's one of the great pulls that fused glass holds over me. I love problem solving and understanding the whys behind the process. So, time to experiment...

First attempt to burn off the adhesive...obviously failed.
Getting to know No Days... The picture above shows the results of my poor plate going into the kiln after the first attempt at burning off the adhesive. 

The firing schedule follows:
300ºF per hour600ºF1.30
off

NOTE: All following firing schedules will have the above layout, with the first column being degrees per hour (in ºF), the second column is the target temperature in ºF, and the third column is the hold time: hours.minutes).

Obviously the adhesive did not fully burn out. The frit is still stuck firmly to the plate and has not dropped to the kiln shelf. Looks "carmelized." Yum.

Detail of caramelized glass...Frit is still stuck in place!

Okay...so the adhesive really holds! Let's see what a second burnout attempt looks like...

Second burnout attempt.

I left the kiln vented for the entire firing so I could observe what was happening. [Also, my studio is in the garage next to a window that I can open for ventilation. I always recommend trying to keep your kiln in a space that is not a living space. That way anything that burns out while firing (binders, adhesives, fiber papers, etc.) will not stink up your house.]

At 800ºF, there was visible smoking.

At 920ºF, there is no visible smoke, but I could smell the adhesive burning off and see brown on the kiln shelf.

After 45 minutes at hold temp (1000ºF), I could no longer see any carbon burnout on the piece or kiln shelf. The frit has not dropped from the glass to the shelf.
  
After the firing was complete, the adhesive in the center of the plate had obviously not burned off. The frit on the edges of the plate can be tapped off of the glass. (This makes me want to do another experiment to see how well the frit holds on to the plate after burning off the adhesive...that's for another post...)

[NOTE: The plate is placed directly on a kiln-washed shelf with no fire paper. The clear glass on top of all the frit is preventing the adhesive from burning out in the center. It would be much quicker to burn off the adhesive if the glass base were on the bottom and the frit on top. However, I need to get the adhesive to burn out and release my frit onto the kiln shelf, so I can replace the clear glass with compatible System 96 glass! This means that it's taking longer for me to burn out the adhesive than it would under normal circumstances (frit on top of sheet glass in the kiln).]

Second attempt firing schedule:
300ºF per hour1000ºF1.30
off


The adhesive has fully burned off after 4.5 hours in the kiln and
three successive low temperature firings.
At this point, I decided to try the second firing schedule again. Why? Well, I don't want to raise my top temperature any further. If I creep up towards 1100ºF, my glass base will start to distort and slump into the frit, and my hope is to salvage that piece to create a different dogwood plate. I figured that another long hold at 1000ºF will help to get that adhesive out from under the glass in the center of the plate. Guess what?!?  After the third burnout attempt, SUCCESS! Full burnout of adhesive. The frit is still stuck to the plate in places, but can be tapped off, mostly.

Third attempt at burnout firing schedule:

300ºF per hour1000ºF1.30
off


The frit that has been tapped off of the clear glass and salvaged on the kiln shelf.

The frit design has been saved on my shelf so I can now prep a clear piece of System 96 glass to cap it with!
This is the frit that was still hanging on the clear piece of glass!
Can you believe the adhesive is still working after all of that?!?
I wasn't able to tap off all of the frit. The adhesive has fully burnt out, but the frit is still sticking together. It did come off of the plate when I wiped it clean, but I just trashed the bits that didn't transfer to the shelf. Below, you can see where I added additional frit to the design to fill in the gaps (aiming for the magical 6mm thickness that glass wants to be at a full fuse).

Take two...(or is it four?)...I've added a clear sheet of Spectrum to
cap the frit that was left on my kiln shelf.


I prepped another sheet of glass, this time using the proper glass: Spectrum clear with Glassline paints.
Full fuse number one...success-ish!
After a full fuse, the plate has a few divots (not to be confused with devit = devitrification; because there's none of that), plus I want to add more depth.

Time to add more depth and detail to the top side of this design
with coarse frits and a No Days Powder Wafer.
Plus, clear frit to even out the thickness of the glass.
There are areas where the thickness of the glass wasn't 1/4," so I added some clear frit to fill in the divots. Also, I wanted more of those embroidery "French knot stitches" and added bits of coarse frit for detail. Then, because the middle was still lacking, I decided to add a No Days Powder Wafer. Uh...what's that? It's still a secret! But, watch for details in the next few months. Oh! And you can sign up for Jacqui Bush's Vegas class to get a jump start on the technique, too!

I'm on a roll! Time to get these projects fired and finished!
For the finishing full fuse, I loaded the kiln with two other projects I've been waiting to fire.
The plate on the lower left is ready for it's first firing. It was also built entirely of frit on clear with No Days Liquid Fusing Adhesive. 90 COE exclusively... I did not have to fire it several times to facilitate full burnout of the adhesive because the clear piece of glass is on the bottom of the frit. This means the adhesive can escape straight up and out of the piece, unlike the previous pictures of the dogwood plate where the adhesive had to escape beneath the clear glass to the edges before burning off.
Also, notice the addition to my kiln shelf of fire paper. Firing on fire paper ensures that any air between the kiln shelf and the plate has a chance to escape, meaning that I get no big, unexpected bubbles bursting through the top of my plates!

Ahhh! What a feeling! Finally finished, well, except for the slump.

Tada! Full fused again and ready to slump. This particular mold is the Round Rippled Drop Out Mold from Slumpy's. I've been really into using drop-out molds against the kiln shelf to make nice flat-bottomed plates. Flat-bottomed plates make my slumping world go 'round...or something like that ;)

Post-slump firing in a drop out mold from Slumpy's.


Wow! You made it all the way to the bottom and the end of my saga! Hope you were able to follow along without too much confusion. However, if you've got questions, I'd love to hear them and see if I can't answer them, as well :) Leave a comment on the blog and I'll do my best to answer!

Thursday, October 17, 2013

Layered Dichroic Glass Jewelry Project Sheet

To download the pdf, visit Streuter's project gallery.
  Fusing scrap bits of dichroic glass together in layers can create jewelry with depth and an aura of mystery. Use this project sheet or the accompanying video below to walk you through the process.

Approximate time to complete project = 2 hours


Monday, September 16, 2013

Fused Glass Snowflake Ornament Project Sheet

To download the pdf, visit Streuter's project gallery.
  With the holidays around the corner, you may be looking for projects to make as gifts. The HoneyDoo Zuper Glue Snowflake Ornament is a quick project that doesn't take much time or glass, but gets lots of oohs and aahs when the wrapping paper comes off!

Approximate time to complete project = 1/2 hour


Monday, June 24, 2013

Q&A Monday ~ Cleaning up Liquid Fusing Adhesive

Continuing with the theme of clean up from last week, here's an email from P. wondering how to clean the Liquid Fusing Adhesive from hands and other surfaces...

Subject: Streuter Technologies: Liquid Fusing Adhesive

What can I use to clean up tools and my hands when I get the No Days Liquid Fusing Adhesive on them?
Thanks, P
No Days Liquid Fusing Adhesive

Hi, P~
The liquid fusing adhesive is sticky stuff! When you're done using it, you can use vegetable oil or petroleum jelly to help get the adhesive off of your hands and tools, then wash with soap and warm water. If there is still a residue, acetone (nail polish remover) will help get rid of it.
Hope that helps:)
Carrie

No Days Instructor and Support
Carrie Strope Sohayda

Hi, there! Carrie, here...

Not only do I travel the country teaching folks how to use No Days adhesives (and other techniques), but I also answer customer support emails about using No Days. So, if you're having an issue with the adhesives, chances are good that I'll be answering your questions!
Since I get so many good questions, I thought it might be a great learning opportunity for people that may be having some of the same issues but haven't thought to email us. Don't worry, I'll keep the emails anonymous!

Also, don't forget that we've got a lot of really fabulous videos (I put those together, too...) on our YouTube channel. So for those of you who are visual learners (umm...we're visual artists, right?), you may want to check them out!

If you've got questions, feel free to contact us at info@streuter.com.

Tuesday, April 23, 2013

Undersea Gardens Tutorial


Carrie Strope Sohayda ~ "Undersea Gardens" 12" x 6"
Materials:
  • 1/4 lb 96 Fusing Canes Alternating 3 Red 2 Aqua Inner Helix
  • 1/4 lb 96 Fusing Canes Green 5 Line Inner Helix
  • 1/4 lb 96 Fusing Canes Cobalt 5 Line Inner Helix
  • Spectrum System 96 Dark Blue Transparent
  • Spectrum System 96 Clear
  • Spectrum System 96 Cherry Red Transparent
  • Spectrum System 96 Medium Green Transparent
  • Spectrum System 96 Deep Aqua Transparent
  • Slumpy's SM-6130 Ripple Swoop Mold
  • HoneyDoo Zuper Glue 
Tools:
  • Mosaic Nippers
  • Fine Tip Sharpie
  • Ruler
  • Glass Cutter
  • Running Pliers
  • Safety Glasses
  • Kiln
  • Papyros Shelf Paper
  • Kilnwashed Kiln Furniture
1. Begin by cutting glass and nipping cane.
•Cut two 2” x 12” and two 1½” x 12” pieces of clear glass.
•Cut two 1½” x 12” pieces of dark blue glass.
•Cut two ⅜” x 12” strips each of dark blue, cherry red, medium green, and deep aqua.
•Mark fusing cane at 2” lengths. Using mosaic nippers, cut fusing canes in each color to 2.”

2. Layout pieces according to the pattern below.
•For the first layer, lay down the smaller piece of clear glass in the middle. On either side, place the
strips of glass on edge, and then lay down the  dark blue pieces of glass to the outside.
•For the second layer, place the two remaining pieces of clear glass on top of the dark blue, and lay the cane out across the clear piece in the middle, securing the outer pieces with a dab of glue.

TIP: If you build on a piece of cardboard, you can easily transport and load the pieces into the kiln.

3. Full fuse & then slump.

Pattern Alterations: •To eliminate strips, add ½” to
the width of the dark blue and clear rectangles.
•To avoid using kiln furniture or fiber paper dams,
cut two ½” x 2” pieces of dark blue & clear to hold
the fusing cane in the middle section.
FIRING TIPS:
•To prevent the fusing cane from shifting off of the base layer of glass while firing, use kiln dams
against the ends. If you don’t have dams or fiber paper, you can alter the pattern using the above
instructions.
•If you want to eliminate bubbles from between the canes, space the canes so that there is a little
wiggle room between the pieces.


Suggested full fuse firing schedule:

200 dph to 1000ºF hold for 45 min
50 dph to 1250ºF hold for 25 min
500 dph to 1450ºF hold for 45 min
full to 1000ºF with no hold
200 dph to 950ºF hold for 60 min
100 dph to 800ºF with no hold
300 dph to 120ºF  with no hold

NOTE: This is a fairly conservative firing schedule, but you may need to make changes based on your kiln.

Tuesday, August 28, 2012

Featured Artist Barb Byrne of Eclectic Treasures


Barb Byrne of Eclectic Treasures has always immersed herself in arts & crafts. She began sewing in high school, working with embroidery and needlework as a young adult, and then spinning and basket weaving when she moved with her husband to a 300-acre farm in mid-Missouri in 1990.
In the late 90s, she wove a full-sized baby cradle for her first grandchild and it was so well-received that she began a small business, aptly named Heirloom Cradles, making and selling doll cradles of all sizes, including miniatures. While on the farm, Barb began growing her own gourds after discovering gourd art, turning her gourds into decorated vases, bowls, and jewelry. She found a way to marry her love of weaving with gourds and her specialty became weaving natural materials onto the rims of decorated gourds.
Fused Glass Coasters using
No Days Liquid Fusing Adhesive
for Frit Detailing

Tuesday, August 21, 2012

Creating Fused Glass Mosaics ~ A Tutorial

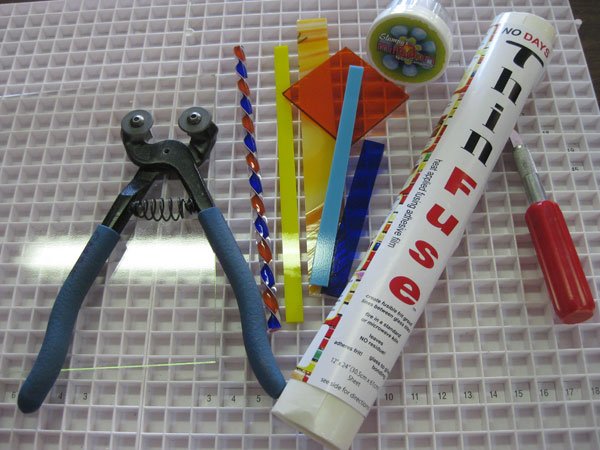
No Days ThinFuse is a thin heat activated adhesive film that allows you to build intricate fused glass designs in a comfortable workspace, and then easily transport your piece to the kiln, ensuring your design stays put. It essentially creates a faux tack fuse, allowing you to eliminate extra firings and cut back on the amount of time it takes to finish a multi-step fused glass project.  Once the adhesive has been heat set, you can continue to add elements to the piece before firing in a kiln.  ThinFuse is a perfect solution for creating quick & easy fused glass mosaics.
Tools and Materials
Materials:
  • No Days ThinFuse Adhesive
  • fusible Spectrum System 96 glass
  • System 96 Carolina Frit
  • Ryan Staub fusing cane
  • No Days Liquid Fusing Adhesive
Tools:
  • glass cutter, running pliers, mosaic nippers
  • scissors or craft blade
  • spoon, small brush
  • standard heat gun, embossing tool, or conventional/toaster oven
  • kiln

Monday, July 16, 2012

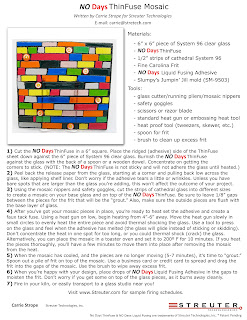
Creating Fused Glass Mosaics Using No Days ThinFuse

To download the pdf, visit Streuter's project gallery.


Creating fused glass mosaics is a breeze using No Days ThinFuse. When you heat set the adhesive to hold the glass pieces in place, you create a faux tack fuse with a super strong bond that allows you to "frout" (grouting with frit) your piece without waiting! If the glass pieces set up but they're not where you want them, simply re-heat to re-position the piece.


Monday, April 16, 2012

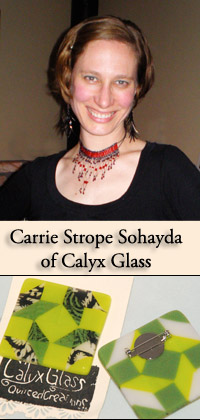
Featured Artist Carrie Strope Sohayda of Calyx Glass

Meet Carrie Strope Sohayda, Streuter Technologies' very first featured artist, now No Days Road Show Instructor Extraordinaire, as well as customer support. When you've got an issue or question, don't hesitate to contact Carrie at carrie@stretech.com!

Carrie Strope Sohayda of Calyx Glass

When Carrie's not firing it up in the glass studio, she's reading everything she can about techniques and trends in glass. As enthusiastic about sharing her knowledge as she is about expanding her own talents, Carrie teaches classes in mosaic, stained glass and fused glass to both children and adults. She is launching the first-ever glass program at the LUX Center for the Arts in her hometown of Lincoln, Nebraska.

Friday, February 17, 2012

NO Days Road Show at Glass Endeavors - Minneapolis, Minnesota


"Grouting" with fine frit

Welcome to Glass Endeavors in Minneapolis, MN!

"In addition to offering supplies and classes, Glass Endeavors also makes a wide variety of stained glass windows, stained glass lamps, fused jewelry, slumped bowls, mosaic tables, mosaic stepping stones and many other one-of-a-kind products to sell...our supply of retail products constantly changes. If you are looking for something specific, talk to us about our custom design services."

The stained glass shop is lavishly decorated with plenty of inspiration and projects. But, it also has large worktables with plenty of tools available for use during open studio hours (2 hours for $10). Zoi & John Sandy also host the monthly meeting of the Glass Club!

"Join other stained and fused glass enthusiasts for the monthly meeting of Glass Club. The club is designed for people of all skill levels and is designed to share work they've done and learn new techniques in the process. The club meets the first Saturday each month at Glass Endeavors. The months will alternate with show and tell of the Glass Club members and Zoi teaching a new technique. The members' homework is to incorporate the new technique into a project of your choice and bring it to the meeting two months later. This is a great opportunity to ask unlimited questions and learn not only from the experience of Zoi and John, but from the other members as well. You'll be inspired and challenged in new and exciting ways. Watch the class schedule for the next meeting. No advance registration is required."

Tuesday, February 14, 2012

NO Days Road Show at Glassic Arts - DeLand, Florida

NO Days Demo with Carrie Strope Sohayda
Welcome to Glassic Arts in DeLand, Florida! Glassic Arts is a small stained glass studio that specializes in creating custom stained glass entryways, kitchen cabinet inserts, room dividers, fused glass vases, bowls, wall art, and more. In addition, stained glass, glass fusing, and lampworking classes are offered!
Studio owner, Kathi Truba explaining "pressed glass"
Plus, if you're too hot in the balmy Florida weather, you can work during open studio hours in an air-conditioned studio for just $5 an hour! As an added bonus, if you need to send any fragile handmade creations to friends, relatives or clients, Glassic Arts is a Safe Ship center with expertise in shipping glass safely!
Sunday, February 12, 2012

NO Days Road Show - Glass Garden, Janesville, Wisconsin


Welcome to the Glass Garden in Janesville, Wisconsin!
It was a cold, snowy day when we set up the NO Days Road Show in Janesville, Wisconsin, but the snow was just a dusting and it was warm and toasty inside.

Shop owner, Judy getting ready for 17 students!

The Glass Garden has a huge inventory, from finished projects to glass, frames, pattern books and other supplies for fusing, stained glass and mosaic. They also offer beginning and advanced classes to show you how to build your very own work of art.

Ready for your studio tour?

Tuesday, January 17, 2012

NO Days Road Show at Art Glass Connection - Cooper City, Florida

Welcome to Art Glass Connection in Cooper City, Florida!

Streuter Tech Instructor, Carrie Strope getting the students ready for
NO Days Groutless Mosaic Adhesive Coasters
 In November, 2011, Streuter Technologies was invited to JoAnna Vitale's stained glass shop in beautiful Cooper City, Florida, near both Fort Lauderdale and Miami. There's loads of eye candy to get ideas sparked when you walk in the front door: books, products, projects, glass...

Groutless Mosaic Coaster class in full gear!
Art Glass Connection offers workshops covering "anything and everything about art glass and we have classes in session year round so there is always something to choose from. We take great pride in the ability of our teachers to not only do quality work in glass themselves but to pass that information along to our students in a format that makes learning fun and relaxing." Check out their great selection of classes, here.  Whether you want to play with the torch, the kiln, grout or solder, you'll find a class!

Wednesday, December 7, 2011

HoneyDoo Zuper Glue for Glass Fusing...


  Glass artist, Carrie Strope Sohayda shares the process of making a fused glass art piece, "1134 Pieces." She creates intricate kilnformed glass art and utilizes HoneyDoo Zuper Glue to help her cut back on time spent loading the kiln...

"I work with glass integrating different techniques, including mosaic, kiln-formed (or fused) glass, glass painting and stained glass. I enjoy experimenting with and combining various techniques and processes, using them to add new facets to my work. I am influenced by intricate geometric designs and color exploration, incorporating a love for quilting, textiles and bright colors inherited from my mother, who was an avid quilter. I love the meditation of breaking glass into many pieces, building them together into a new form. I enjoy that kilnformed glass can be a challenge. There's always a chance for surprises and accidents. When the kiln lid closes, the glass can shift as it changes from a solid to a liquid and back. The transformative and independent nature of kiln-formed glass and its lessons of detachment have helped me evolve not only as an artist but also as a person, and makes me want to share glass as a medium with as many people as possible."

Exhibition photographs by Jenni Brant.

Wednesday, November 9, 2011

Adhering Glass Together for Fusing in a Kiln with No Days Glass Fusing Squares


No Days Glass Fusing Adhesive is a heat set adhesive that cures strong and burns off in the kiln leaving no residue.

The adhesive is available in packs of  25, 50 and 100 one inch Squares that can easily be cut to size with scissors or a razor and placed between layers of glass. 

Saturday, October 15, 2011

Adhering Bails to Pendants using an Oven with No Days Bailbond


Heat setting several pieces at once in an oven/toaster oven


It’s easy to use No Days BailBond on several pieces and heat set them all at once using an oven.

Cut a piece of BailBond to fit the size of your bail.

Use a bit of painter’s tape to create a sandwich by placing your BailBond between the pendant and the bail. The tape will prevent the bail from moving in the oven once the BailBond has melted. Place the pendant sandwich face down.

Primer for Using No Days BailBond Adhesive for Jewelry and Other Findings


Beginning to Use No Days BailBond

When you first begin to use No Days BailBond, you may be frustrated by a bail that won’t stay where you put it. As the heat set adhesive turns to liquid, the bail may slide along the surface. 

To help keep your pendant, BailBond and bail in place before the adhesive sets, you can use a bit of painter’s tape to hold the pieces together. While you’re still getting used to working with No Days BailBond, there is a greater chance of overheating with this technique, because you can’t see the adhesive or feel when the adhesive bonds with the bail and the pendant. This means a bit more clean up, but it’s still simple. 

Attaching a Cabochon to Purse Hanger with No Days Bailbond


Adhering a Fused Glass Cabochon to a Purse Hanger Finding Using No Days BailBond


No Days BailBond is versatile and works well with a number of different findings. For this video, I’ll demonstrate how easy it is to use BailBond to attach a cabochon to a purse hanger finding.

Using a Soldering Iron to Attach a Bail to a Pendant with No Days BailBond


Heating No Days BailBond using a Soldering Iron

No Days BailBond is a heat set adhesive that is quick and easy to use. By heat setting with a battery powered portable electronics soldering iron:
  • You’re able to feel when the NO Days BailBond is beginning to adhere. 
  • You can pinpoint the heat exactly where you need it. 
  • It’s portable and easy to use at a show, where you may not have access to electricity.