Interested in becoming a NO Days Featured Artist?

Interested in becoming a NO Days Featured Artist?


Want to share your artwork made using NO Days products with the world? We want to help you promote your work! We love seeing the various ways artists are using NO Days products! We share our Featured Artist spotlight with our newsletter subscribers, our Facebook friends and fans, on our Featured Artist Page and right here on our blog, linking back to your website.

Simply send an email to info@nodaysadhesives.com with the subject: Featured Artist. Be sure to include your name, email address, and website (if you have one) along with a brief bio and pictures of yourself and your artwork made with NO Days Products. Not sure what to include in a bio? Tell us how you became interested in playing with glass or crafts. How about where you get your inspiration? Oh! And don't forget to tell us why you love using NO Days!
Showing posts with label featured artist. Show all posts

Tuesday, July 14, 2015

No Days Mosaic Creations by Mary Anne Maslanka

Mary Anne Maslanka 
Locust Grove, GA 

 I have been using No Days Mosaic Adhesive almost as long as it has been produced. Both Brad and Bart Streuter have always been available and willing to take the time to answer any questions I have ever had...This company is doing everything right!
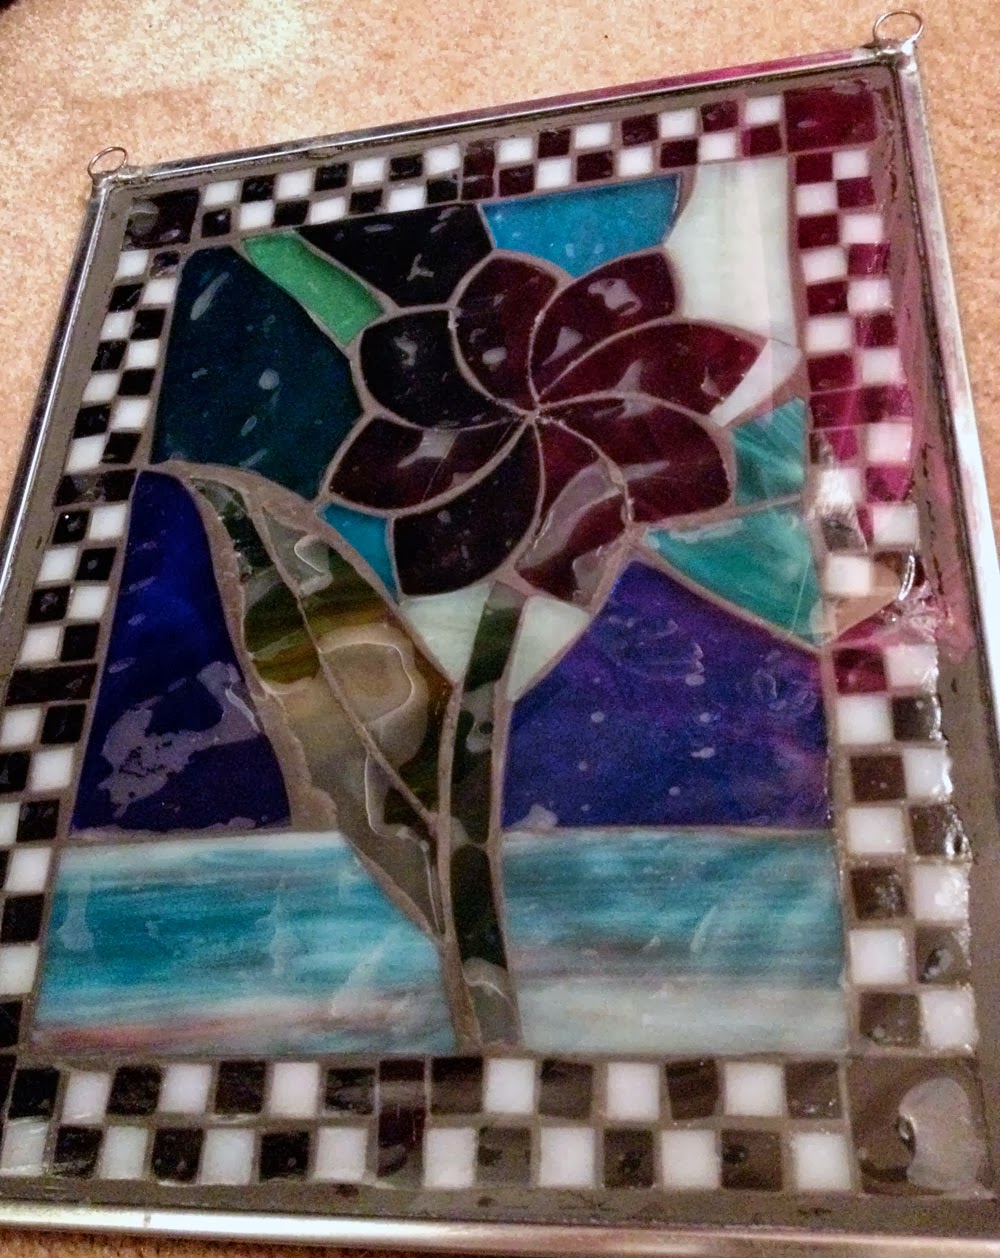
 Fleur de Lis Glass on Glass (GOG) mosaic made in an 18"X20" picture frame
using No Days Mosaic Adhesive and no grout.
As a stained glass artist and instructor for many years, I had never tried mosaics until Streuter introduced the No Days Mosaic Adhesive. It looked so easy, I had to try it....Then, I realized I could offer my students new projects using the product.
I made this glass on glass hummingbird mosaic
using a stained glass pattern, and No Days Mosaic Adhesive.
Now, every summer at a local senior center, I offer a glass on glass mosaic workshop so the senior members can bring their grandchildren for a fun few hours of using their imaginations and producing a small framed mosaic to take home...
I found this wooden cross at Hobby Lobby,
and I assembled it using No Days Groutless.
I also really like the No Days Bail Bond. I use it on small projects to attach a bail to hang instead of drilling a hole in the glass....works great!
This mosaic rose was created by a teen in one of my mosaic classes using just scrap glass, her imagination, and No Days Groutless Mosaic Adhesive.
I also use the No Days Glaze sometimes when attaching a zinc frame to my panels. I have even used it on a wooden frame...
This is a little round box with a glass insert in the lid that I bought at a thrift store.
I used No Days Mosaic Adhesive, then grouted it.

A small wooden tray I made using No Days Mosaic Adhesive.

Wednesday, August 20, 2014

Artist Spotlight ~ Jackie Doehling of Full Moon Loon Designs

Meet Jackie Doehling of Full Moon Loon Designs!
Full Moon Loon Designs is my artist name & the Doing Business As (DBA) name I chose when I decided I might want to pursue this as a little more than a casual hobby. Why “Full Moon Loon?” The loon is our state bird here in Minnesota, and the full moon – well, that seems to be when I feel the most creative. Sometimes I am just bursting with creative energy around the time of the full moon, and in fact there was a full moon when I came up with the name.
No Days featured artist Jackie Doehling of Full Moon Loon Designs

I still consider myself a beginner in this wonderful world of glass as there are so many techniques and methods I have yet to try. I was introduced to glass fusing in a small workshop type get-together a friend of mine had at a local studio. We made pendants out of scrap glass and that was all it took, I was HOOKED! Back in 2010 I bought a microwave kiln and it was a fun way to get started with small pendants and pieces, but I knew I wanted to do more. I bought my first “real” kiln in early 2011 and added a second one a year later. One of my favorite methods in glass design is using stencils and powders. Powders and frits allow you limitless possibilities when it comes to design. You can follow a pattern or create something completely random and unplanned (sometimes those are the best projects!)
Jackie joined Shannon's Stained Glassery for a No Days Road Show
and classes on frit painting

For the past two years I have entered pieces into the Minnesota State Fair and on both occasions I won a third-place ribbon. This year I am entering a piece where I used a method I learned in a No Days Road Show, frit painting. The top layer is a pair of Lady’s Slipper flowers (Minnesota state flower), the second layer is our state bird, the loon, and the base layer is a piece of blue swirled glass representing the “Land of 10,000 lakes.” Each layer is actually a design layer plus a layer of thin clear fused together, so in the final firing it was six layers of sheet glass plus frit. I call it “Minnesota in Glass” and while it didn’t make it past the first round of the juried fine arts competition, I am not giving up! Instead I am entering it into the Creative Activities which is where I have entered the past two years. Perhaps the third time’s the charm?

Jackie's tribute to Minnesota, a frit painted piece
using No Days Liquid Fusing Adhesive

I love the No Days Liquid Fusing Adhesive as it works great for not only the frit painting process, but also for holding things in place before firing. It always burns off clean and has never left any marks or residue on my glass. My first experience with a No Days product was the ThinFuse Adhesive. It works great for building designs with several pieces of glass like a quilt pattern or mosaic design. I also like the BailBond adhesive for attaching bails to pendants, it works like a charm (no pun intended!)
I love the No Days Liquid Fusing Adhesive as it works great
for not only the frit painting process, but also for holding
things in place before firing. It always burns off clean and has never left
any marks or residue on my glass.

While glass is my true passion, I am employed full time in IT as a business analyst. I earned my Master of Science in 2012 in Technical Communication and my Bachelor of Science (2006) is in Management Information Systems. While I’ve never taken any art classes while working on my degrees, I do pursue local workshops and classes from time to time and wouldn’t mind teaching at some point. I keep hoping to win the lottery so I can retire and play with glass full-time! So far, I haven’t sold in any shows but I am getting my website up and running and hope to have my store page live this year. You would think being an IT type, the site would be a no-brainer, but if it’s a choice between working on glass and working on a site about glass, well you can guess where I am likely to spend my time!

Full Moon Loon Designs ~ Jackie Doehling

Jackie Doehling
Owner & Artist, Full Moon Loon Designs
July 2014

Wednesday, July 23, 2014

Artist Spotlight ~ Mary Ann Celinder of Celinder's Glass Design


Meet Mary Ann Celinder of Celinder's Glass Design


Mary Ann Celinder is a glass artist in Huntington Beach, CA.
Most of her work is residential stained and leaded glass windows
with an emphasis on entry systems.
She’s been creating windows since the mid 70’s.

Mary Ann's fascination with glass began as a child sneaking peaks at the rose window in church. At sixteen, she began to paint on glass, but pursuing a love of literature, received her B.A. in English from Cal State Fullerton in 1976. Art classes were always in the schedule and in her senior year, a course in stained glass changed her direction.


"I used No Days Glaze in the sky and border.
The panel was built in 3 sections for an overall 6’ x 6’.
The No Days also went into the joining came at the job site."

"I was hooked as soon as I completed my first window. I knew this would be my life's work. I feel very lucky to make a living doing something I love." The next several years were spent studying glass and design by taking additional art classes.

Exterior view of the eagle transom.

Mary Ann worked for two local studios. One did restoration work for auction houses. This was a valuable lesson in learning why a window fails. Between commissions, she worked at another studio, but her desire to create her own designs pushed her to open her own studio.

"Beveled diamonds in a turret."

Most of her studio's work is in private homes and restaurants throughout South California. 

"The home is on a windblown Chino Hills rise.
Subject to lots of weather, we didn’t want to take any chances with the elements.
So we used No Days Glaze to create a weatherproof seal between the
diamond bevels and the lead came."

There are six leaded glass panels in total.

"The No Days Pre-Glazed Came made the
four lighting inserts very stiff.
(Someday those light bulbs will need changing!)
We also wanted to keep the (food) prep area free from putty debris."
Overall size: 105” x 42”.

"The interior designer wanted the look of wrought iron with the textures of leaded glass.
By cutting the lead heart out with a Dremel blade, I curled the lead as desired.
The lead is secured (to the glass) with No Days Glaze. Heated on both sides, it held well."

"With the large center panel, No Days Glaze was great for holding the borders to the glass.
It will keep the panels together so they won’t spread apart or leak."
"There are reinforcement bars in the skylights,
but using the No Days Glaze made the panels stiff while handling,
and we’re not worried about them sagging."

"No Days Glaze made installation easy because it
reinforced the panels and prevented them from sagging or bending."

The project is in a home movie theater in Beverly Hills.

"The (mosaic) stairs were laid in thin set.... what a back breaker!
Three steps was all that could be handled in a day."

"I wised up on the top landing and bought a wonder board and No Days Mosaic Adhesive film.
The 3’ x 3’ section was worked at a comfortable table height, then dropped into place.
That’ll be the plan next time we do a stairwell for the whole project!"

Celinder’s Glass Design is affiliated with the Stained Glass Association of America. Mary Ann is a founding member of the International Guild of Glass Artists and serves on the Guild’s Advisory Board. She is also a member of the Huntington Beach Art League and BNI, a business networking group.
Mary Ann Celinder
Celinder's Glass Design
21341 Fleet Lane
Huntington Beach, Ca 92646 
Studio 714 962 8361

Friday, July 11, 2014

Artist Spotlight ~ Trish Rossiter of TR Mosaics

Trish Rossiter of TR Mosaics (now Meraki Mosaics)

Trish is a self taught, mainly glass on glass (GOG) mosaic artist of about 6 years. “ I love using tiny pieces of stained glass in my mosaics and was thrilled to try No Days Mosaic Adhesive film and loved how this piece turned out! :) Definitely using this adhesive for my next project!”

Trish says, "I used the No Days Mosaic Adhesive for the rocks,
as well as the glass and it worked perfectly!"

"It was love at first sight when I spied a mosaic window hanging
inside a (yummy :) bakery in Almonte, Ontario a few years ago.
Simple, yet beautiful, I  imagined the mosaic hanging in my garden.

Just up the street from the bakery was a neat little shop filled with
mosaics for sale. I was like a kid in candy store!  Alas, the cost of
my favorite piece was beyond my means. I was so inspired however, I
immediately decided that I would try my hand at this ancient art.


It was the perfect time to tap into my creative side. Being a sleep
deprived mom, working on a master’s thesis had left me stressed to the
max and chipping glass quickly became my escape from reality!


Fast forward several years … boy where did that time go! And what have
I actually done with my life since? Well, I've retired from my nursing
career and I have thankfully cut my stress level to a quarter of what
it was…  I am a happier and more “present” mom to our kids. Inspired
by the beauty all around me - usually my children, pets or nature - I
continue to love the challenge of capturing that beauty in my glass on
glass mosaics. I recently started a Meetup group for Mosaic-ers in my
community and am thrilled to mosaic regularly with like minded
artists! 


Wednesday, June 11, 2014

Artist Spotlight ~ Eliza from Blair House Art & Jewelry


Eliza shared a few pictures of some quick projects she creates using No Days Mosaic Adhesive film. Thanks, Eliza!
Five Boats in Blue ~ created with NO Days Mosaic Adhesive film
& scraps of stained glass on framing glass
 
These are a few of my first uses of Streuter NO-DAYS Mosaic Adhesive Film. The projects go quickly! I have just been using leftover glass pieces from stained glass projects and Cats eye glass from the jewelry I make, building on backgrounds of glass from float picture frames (I also do Photography). The Blue glass was a request from a friend who loves blue glass anything. I made this in one night. There are 5 sailboats. She didn't want it grouted and it was later copper foiled and soldered with hooks to hang on her sun porch. 
Eliza's first No Days Mosaic
I really enjoy making these. It is so easy I feel like I'm cheating but still do it. This is the first one I made. I heated it on silicone pad in the oven. When I took it out, I touched each bead with the end of a small paint brush to make sure all the pieces had contact with the film adhesive.

Eliza's "Random Glass" mosaic grouted in white
Some of the things that I've learned that may be useful to other artists:
  • I use a small paint brush tip to press all the pieces to make sure they have contact with the film after heating or taking out of the oven. 
  • Also, I first make sure the back of all pieces are flat. 
  • I've had trouble with bubbles forming in the adhesive if it's not covered with anything. To fix this, I have added embossing powder to cover the film (or later the bubbles) up and put it back in the oven or use a heat gun, heating it a little longer to attach the powder to the film. I use different colors of embossing powder, but found that if I heat it too long it all turns to copper color which I guess is the base color under the pastel colored powders.
Glass, cats' eye cabochons and a pendant in a wooden frame,
with embossing powder to fill in some of the gaps.
Gaps filled with embossing powder
I have donated some of my film to the Senior Center and worked with them making smaller pieces (4"x6" & 5"x7") using a heat gun. They have been making regular stain glass items and enjoyed being able to make some pieces quickly as their projects take a long time to make.

"It's 5 O'Clock Somewhere" (picture is upside down)
  This piece is the size of a full cooking sheet made entirely of cats eye cabochons. I placed it in a room temperature oven, then heated it @180ºF for 20 min. When done, I added embossing powder to cover bubbles and heated again for a few minutes.  I always leave room around the edges for frame or solder. After taking the pictures, I decided to move the pink bead at 6 o'clock to the 5 o' clock spot, framed it and put it in our RV window. Title = "It's 5 O'Clock Somewhere!"


Tuesday, May 20, 2014

Mosaic Artist Spotlight ~ Allan Punto of Arto Punto

Allan Punto of Arto Punto shared some photos from an installation in London, UK.
He built the mosaic on No Days Mosaic Mesh before transporting to the installation site for permanent adhesive using mortar.
8' x 2' mosaic created by Allan Punto of Arto Punto
on No Days Mosaic Mesh
"Here is a photo of the installed mosaic in London that I prepared using No Days Mosaic Mesh. The size is 8 feet by 2 feet and the tiles are Winckelman porcelain and Sicis glass. I used Rocatex Rapid Set adhesive and Grout."
Allan built the mosaic on No Days Mesh and cut it into 16 sections
to make installation easier.
"The panel was constructed in 16 sections to make transportation and installation straightforward. Prior to installation the sections were laid in situ for the client to make sure she was happy with the tones of the panel. She liked it all but decided that a softer blue would work better than the white in the big flower. This was not a problem because I had used mosaic mesh!"
Detail shot of the mosaic tiles that needed to be changed out
at the customer's request. Changing the tiles is easy by reheating
the adhesive and quickly switching out the design.

"A particular benefit for this installation of using the mosaic mesh was the easy process of changing a layer of cut tile in the big flower below to change the tone at the request of the customer. I just needed to reheat the individual pieces, remove them and replace them with a softer blue in place of white."

See more of Allan Punto's work at Arto Punto at http://www.artopunto.co/ 

Wednesday, April 16, 2014

Glass on Glass Lotus Mandala by Debbie Percelay

Debbie's mosaic based on pattern by calyxann.etsy.com

Recently, Debbie shared some pictures of the glass on glass mosaic she had been working on. Along the way, she had a few questions about different methods of heating the No Days Mosaic Adhesive. Debbie asked, "Can I put the entire piece in the oven? If so at what temp?"

Placing all the mirror and dichro dots just so...

 Yes, yes, you can! When I'm working on larger glass substrates, I put the piece in the oven at room temperature, and then set the temperature for 180º-200ºF.  While the mosaic heats up, I work on other projects around the studio/house. The adhesive goes clear and looks wet when it melts. After 10-15 minutes, I'll check back with the mosaic and test the pieces a bit using a pair of long tweezers to see if they slide easily.


"No nasty fumes? That's great! I imagine this will be much better than using my embossing gun! Should I set it straight on the oven rack?"


 Placing the mosaic straight on the rack is fine. Heating the piece in the oven gets the job done much more quickly and evenly than heating with a heat gun or embossing gun. If you're using a heat gun, you have to slowly heat the whole piece very evenly. If you don't heat a large glass substrate evenly, there's a chance of thermal shocking the glass, which results in a big crack! I have heated a larger piece with a heat gun in a pinch, but it's definitely a patience game. Using the oven (or a kiln) to heat the piece allows you to multi-task. After it's heated evenly in the oven and you remove it, you can continue to heat with your embossing tool to move pieces into place.
 
When the light reflects off of the mirror and dichro, there's tons of sparkle.

When Debbie finished her project, she shared pictures of it in the sun and in the window with backlighting. "I love it Carrie! When it's hanging in the window it's harder to see the dichro blobs and mirror, so maybe it will hang on a wall at some point. Already thinking about the next one!"

When the light is shining behind the piece, the bright, transparent colors
in the middle grab the spotlight!

Below is a video for working with No Days Mosaic Adhesive in glass on glass mosaics:

Friday, January 3, 2014

Mosaic Artist Spotlight ~ Gayle Haynie of Glass by Gayle

Mosaic beach scene made in a wooden tray using No Days Mosaic Adhesive.
By Gayle Haynie
 We love receiving customer feedback and seeing all the creative projects made with No Days Adhesives! Recently, Gayle Haynie of Glass by Gayle shared some of the projects she's been working on.
"I used No Days Groutless Adhesive and No Days Mosaic Adhesive.  I bought the metal tray at a garage sale.  I wish I had more of those type of metal trays. I used the Groutless on that project.  The beach scene is done on a wood tray.  I used the Mosaic Adhesive on that one.   I love using your products.  I recommend your products to my students and anyone who is a crafter."
Mosaic 12" heart metal tray made using No Days Groutless Mosaic Adhesive.
By Gayle Haynie
If you've got projects you'd like to share with us, feel free to email info@streuter.com.

Monday, September 30, 2013

Q&A ~ Using No Days Q-Stik for Windows

Subject: Streuter Technologies: Q Stik temperatures

Can a glass piece made on No Days Q Stik be fitted vertically in a window (10 1/2"w x 23" h)  without problems?  I'm planning on building a window to fit a south facing window in Arizona. In the fall, winter & spring, the sun will be directly hitting the window. The room in the summer is not air conditioned, so inside temperature will be about 85-90 degrees.
Thanks!


Hi~
Are you wanting to do a mosaic on glass? The QStik isn't transparent, so you would be able to see the film between any pieces of glass.
Otherwise, the heat set adhesive doesn't reactivate until it reaches 160dF. It should be fine.
Does this help?
Carrie

Bobbi Barnes mosaic window made using No Days Q-Stik

Hi, Carrie~
I finished the 2 windows. I really like and enjoy using your products. The only problem I had was if the glass was uneven on the back the glue wasn't adhering to all the surface.
Thanks for your help!

Hope you enjoy the pictures; the design came from a few pictures and my brain!
Bobbi

Bobbi Barnes mosaic window made using No Days Q-Stik


Update: 
 To answer the question in the comments below and to clarify (ha!) the point of transparency, I've included some pictures of my own project that I threw together in 3 hours + plus grouting.
Backlit from the front. Carrie's project with Q-Stik and scrap stained glass.
Here is the window I threw together in one evening (minus grouting). I used glass strictly from the scrap bin in the studio, so I've got a wide variety of glasses to look through.
Backlit and looking at the back of the panel.
When the panel is lit from behind, the No Days Q-Stik doesn't really hinder the appearance of the mosaic window.
You'll notice that the non-transparency of the Q-Stik becomes a problem
if you're looking at the panel from the back, without back-lighting.
However, if the window is not lit from behind, well...then, you can see all the areas where the glass is not attached to the adhesive (bubbles) and a bit of a haze from the pressure sensitive adhesive film.
A big problem area for me was this bit of scrap stained glass
that made up the leaf. It was not flat at all! In fact, I went back and
intentionally broke it so it would lay flat without getting grout underneath.
The detail shot gives you a glimpse of my big problem area (from behind, so it's never a problem if no one sees this side of the window) where the glass I used for the leaf curves away from the window and adhesive sheet.

Hope this helps to clear up some of the questions. If not, let me know and I'll try to help out further!
~Carrie

Wednesday, August 21, 2013

Tips & Tricks for using No Days Mosaic Adhesives from Dan Gamaldi of Cradle of the Sun in San Francisco

   Dan Gamaldi of Cradle of the Sun contacted us to share the installation of his entryway mosaic outside his shop in San Francisco.  He underestimated the amount of time that it would take him to finish the mosaic, as he only worked on it in his "free" time; Dan generally works on commission stained glass windows for homes and offices in the Bay Area.  Over a period of four years, he really got to know the ins and outs of working with No Days Mosaic Adhesive. The approach to creating the "Waterfall City" mosaic was different than I've heard of using before. Instead of building on mesh, Dan used a base of aluminum foil prepped with No Days Mosaic Adhesive film.
Dan lined a plywood base with aluminum foil and then No Days Mosaic Adhesive film
Many of the pieces of glass he used in his design (based on "Waterfall City" by James Gurney) were small, and Dan didn't want to blow them away while heat setting the adhesive with a heat gun. So, he came up with several solutions.
For very small pieces of glass, Dan heat set the adhesive using a soldering iron.
  Among the solutions for heat setting that he came up with were: using a soldering iron for very small pieces of glass (such as millefiori), a regular clothes iron for heating small sections of the mosaic...
For heat setting small areas of the mosaic, he used an iron.
and, finally, the No Days Curing Station to heat set larger areas of the mosaic.  Using the irons and Curing Station allowed Dan to heat set portions of the mosaic without causing the adjacent adhesive to shrivel back on itself (which can happen when using a heat gun).
Dan used Streuter's No Days Curing Station to heat set large areas of the mosaic all at once.
  Visit Dan's website at Cradle of the Sun to see more pictures and read about the whole process. Below is the video of the mosaic being installed in the entryway of his shop.


To see the piece in person, visit Cradle of the Sun in San Francisco:
3848 24th Street
San Francisco, CA 94114
(415) 821-7667

STORE HOURS:

Mon-Tues CLOSED

Wed-Fri 11:00-6:00

Sat 9:30-6 (*Class 'til noon)

Sun 10:30-4:00 (*Class 'til 1)

(*Space limited during classes. Please come after class hours for sheet glass cuts)