Interested in becoming a NO Days Featured Artist?

Interested in becoming a NO Days Featured Artist?


Want to share your artwork made using NO Days products with the world? We want to help you promote your work! We love seeing the various ways artists are using NO Days products! We share our Featured Artist spotlight with our newsletter subscribers, our Facebook friends and fans, on our Featured Artist Page and right here on our blog, linking back to your website.

Simply send an email to info@nodaysadhesives.com with the subject: Featured Artist. Be sure to include your name, email address, and website (if you have one) along with a brief bio and pictures of yourself and your artwork made with NO Days Products. Not sure what to include in a bio? Tell us how you became interested in playing with glass or crafts. How about where you get your inspiration? Oh! And don't forget to tell us why you love using NO Days!
Showing posts with label mosaic. Show all posts

Saturday, January 30, 2016

No Days QStik Adhesive = Mosaic Wallpaper

What is No Days Q Stik Mosaic Adhesive?


  One side of the No Days Q Stik Mosaic Adhesive utilizes the advantages of No Days' heat activated adhesive for tile placement, while the back side of the Q Stik film contains an industrial strength, quick stick mounting adhesive for permanent mounting of your mosaic to a wide variety of large or small  interior surfaces, both horizontally and vertically.  It's basically, a customizable mosaic wallpaper. So, how do you use it?


Begin by cutting the Q Stik to size, then cut and place your mosaic tiles on the waxy side of the Q Stik. After all or part of your tiles are in place, use a heat gun or heat embossing tool to activate the heat set adhesive. Grab a pair of tweezers to move the tiles into place before they cool and bond to the Q Stik paper. (If they cool and you can't move them, you can always reheat them to re-position the tiles.)


When the adhesive and tiles have cooled down, the bond will be permanent (unless you decide to heat the tiles up to 160 degrees F / 70 degrees C), and you're ready to install. Peel back the paper the covers the pressure sensitive adhesive and press into place.


Depending upon where you're planning on installing the mosaic, you may need to support the adhesive for awhile before the permanent bond takes over. In the pictures, I've installed the mosaic upside down on an archway to see how well the QStik sticks. It's installed over some glossy paint in a strip roughly 6" x 18".


This was the last project on my to do list before leaving the studio, so I taped it to help keep it in place (just in case the adhesive needs some help sticking while it's curing). When I get back to the studio, I'll finish by grouting and then report back in intervals to let you know how well my mosaic wallpaper is sticking...


Thursday, December 10, 2015

Mosaic Holiday Ornaments with No Days Groutless


No Days Groutless Upcycled Mosaic Jar Lid Ornaments
It's that time of year when gift giving is sneaking up on us, and everyone is looking for ideas for homemade or handmade gifts to give. It's especially meaningful for the littles to be able to make something to give to their family members. If you're looking for fun, quick, and fairly inexpensive gifts for the kids to make for moms, dads, grandparents, teachers, aunts, uncles...basically everyone on their list; then you'll want to check this out!

Tools & Materials needed:
  • No Days Groutless Mosaic Adhesive
  • metal jar lids
  • hammer & nail (to pierce jar lids)
  • sturdy wire (16 or 18 gauge brass, copper, steel)
  • round nose pliers / wire cutter (to cut and shape wire)
  • scissors (to cut groutless)
  • tweezers (helpful for placing tiles)
  • warming device (This can be a griddle, toaster oven, oven, candle warmer, heat gun, or heat embossing tool.)
  • tiles for mosaicing (or beads, baubles, sparkles, etc.)
  • mosaic nippers to cut tiles
  • safety glasses


Not only is this a nifty way to upcycle jar lids and make some beautiful gifts, this is a great project for the kiddos, as well as for working with more advanced mosaics. The process is simple and quick!


To begin with, you'll need to save your lids. Wash them in soap and water. Next, you'll need a way to hang them, so take them to the work shop and get a hammer, some small nails and a block of wood. Hammer the nails through the side of the lid to create 2 holes, like this:


Create a wire hanger with round nose pliers.
 After bending a length of wire into a U shape, fit the ends through the 2 holes in the lid. Then, using the pliers, bend each leg back on itself to secure it in place and prevent it from falling back out of the lid.


Insert the wire and bend it to fit inside the lid.
And here's a video for you visual learners :)


Once you've got the lid prepped, you can cut some No Days Groutless Mosaic Adhesive to fit the inside of the jar lid. You don't need to cut it exactly, and you can use scraps if you have them, too.


A candle warmer works great for setting the No Days Groutless into the jar lid.

I find that it's easiest to prep the adhesive by heating it and then letting it cool before using. That makes it lay flat against your substrate and turns several pieces into just one. If you need to cover any spaces that go bare after heating, you can spread the groutless around the surface of your lid like the video below shows:


After heating, it's best to let the adhesive cool down again before laying your tiles. I'm using a candle burner / wax warmer that is the perfect size for working with jewelry and small projects that conduct heat (like the metal lids). 


Here, you can see that once you turn the heat on and the heat transfers through the metal to the adhesive and then the tiles, you can move the tiles into place by sliding them or pushing them with tweezers. The tiles in the middle were placed while the adhesive was warm, but that tends to make a mess. If you wait until the adhesive is cooled, lay your tiles and then heat the whole thing, it tends to make less clean up of adhesive that has covered the surface of your tiles.


Below you can see my first attempt (top right) and second attempt (bottom left).  The tiles on the first star were laid while the warmer was on and the adhesive was liquid. The adhesive tends to get on your tool and the top surface of your tiles this way, leaving more clean up. The second star was laid after the adhesive had cooled and then heat set all at once, making much less of a mess to clean up.
No Days Groutless Starmen:
the star on the top right was laid in liquid Groutless, while
the star on the bottom left was laid on solid Groutless and
then heat set after all tiles were laid.
The adhesive that covered some of the surface of the tiles can be scraped at with a sharp tool, like a razor or small screwdriver. 
Close up shot of No Days Groutless Starman
This project works great for children's projects, too. Square tiles can be cut with nippers to fit in the lid in simple designs.
No Days Groutless Mosaic made with nipped squares.
Side note: Pixelated images are perfect for mosaics, and my niece is really into Super Mario Bros. (IT"S BACK!!!!) My brother (her father) and I used to play this game for hours when we were kids. I mostly watched him play. I used to design game levels with pencil and paper, but now you can do that with the new Mario Maker game!!! What?!? So, that's my inspiration for making the Starmen above :)

Tuesday, July 14, 2015

No Days Mosaic Creations by Mary Anne Maslanka

Mary Anne Maslanka 
Locust Grove, GA 

 I have been using No Days Mosaic Adhesive almost as long as it has been produced. Both Brad and Bart Streuter have always been available and willing to take the time to answer any questions I have ever had...This company is doing everything right!
 Fleur de Lis Glass on Glass (GOG) mosaic made in an 18"X20" picture frame
using No Days Mosaic Adhesive and no grout.
As a stained glass artist and instructor for many years, I had never tried mosaics until Streuter introduced the No Days Mosaic Adhesive. It looked so easy, I had to try it....Then, I realized I could offer my students new projects using the product.
I made this glass on glass hummingbird mosaic
using a stained glass pattern, and No Days Mosaic Adhesive.
Now, every summer at a local senior center, I offer a glass on glass mosaic workshop so the senior members can bring their grandchildren for a fun few hours of using their imaginations and producing a small framed mosaic to take home...
I found this wooden cross at Hobby Lobby,
and I assembled it using No Days Groutless.
I also really like the No Days Bail Bond. I use it on small projects to attach a bail to hang instead of drilling a hole in the glass....works great!
This mosaic rose was created by a teen in one of my mosaic classes using just scrap glass, her imagination, and No Days Groutless Mosaic Adhesive.
I also use the No Days Glaze sometimes when attaching a zinc frame to my panels. I have even used it on a wooden frame...
This is a little round box with a glass insert in the lid that I bought at a thrift store.
I used No Days Mosaic Adhesive, then grouted it.

A small wooden tray I made using No Days Mosaic Adhesive.

Monday, November 10, 2014

2015 Glass Craft & Bead Expo ~ Glass on Glass Mosaics with Carrie Strope

Wednesday, April 8th, 2015 from 9:00 AM - 5:00 PM
Instructor Carrie Strope

In this all day class, you will sharpen and hone your glass cutting skills while building an 11” framed mosaic that’s ready to take home at the end of class.
Glass on Glass Mandala Mosaic made with recycled church windows
by Carrie Strope
 You will learn tricks for cutting circles, how to frame your mosaics with zinc edge came, basic soldering skills needed to make your own metal frames, tips and tricks for working with No Days Groutless, and how to choose the best adhesive for your project (several different examples made with different adhesives and the pros and cons of each will be on display for discussion).
Glass on Glass Mosaic created using No Days Mosaic Adhesive
 We will discuss basic color theory to help you choose your glass, talk about pattern variations and the best way to approach cutting a pattern out of a sheet of glass and finish with grouting pointers as we complete a mosaic in one day!
Stained glass window panel with fused glass inclusions as well as
glass on glass flower inclusions
 If you've ever wanted to explore mosaics or enhance your repertoire, Carrie will show you how easy it is to start combining your skills to create unique pieces with mosaic, stained glass and fused glass.
This is also the perfect class to brush up on your cutting skills! Learn tips for glass cutting from the 2014 Super Pro Glass Cutting Champion!
Super Pro Glass Cutting Contest at the 2014 Glass Craft & Bead Expo
  Students bring: safety glasses and glass cutting tools. Some cutting tools will be available for classroom use.
Fused glass sconce night light created with the same pattern
from the mosaic mandala class. Get tips for cutting glass
to create stunning fused glass art.


Friday, July 11, 2014

Artist Spotlight ~ Trish Rossiter of TR Mosaics

Trish Rossiter of TR Mosaics (now Meraki Mosaics)

Trish is a self taught, mainly glass on glass (GOG) mosaic artist of about 6 years. “ I love using tiny pieces of stained glass in my mosaics and was thrilled to try No Days Mosaic Adhesive film and loved how this piece turned out! :) Definitely using this adhesive for my next project!”
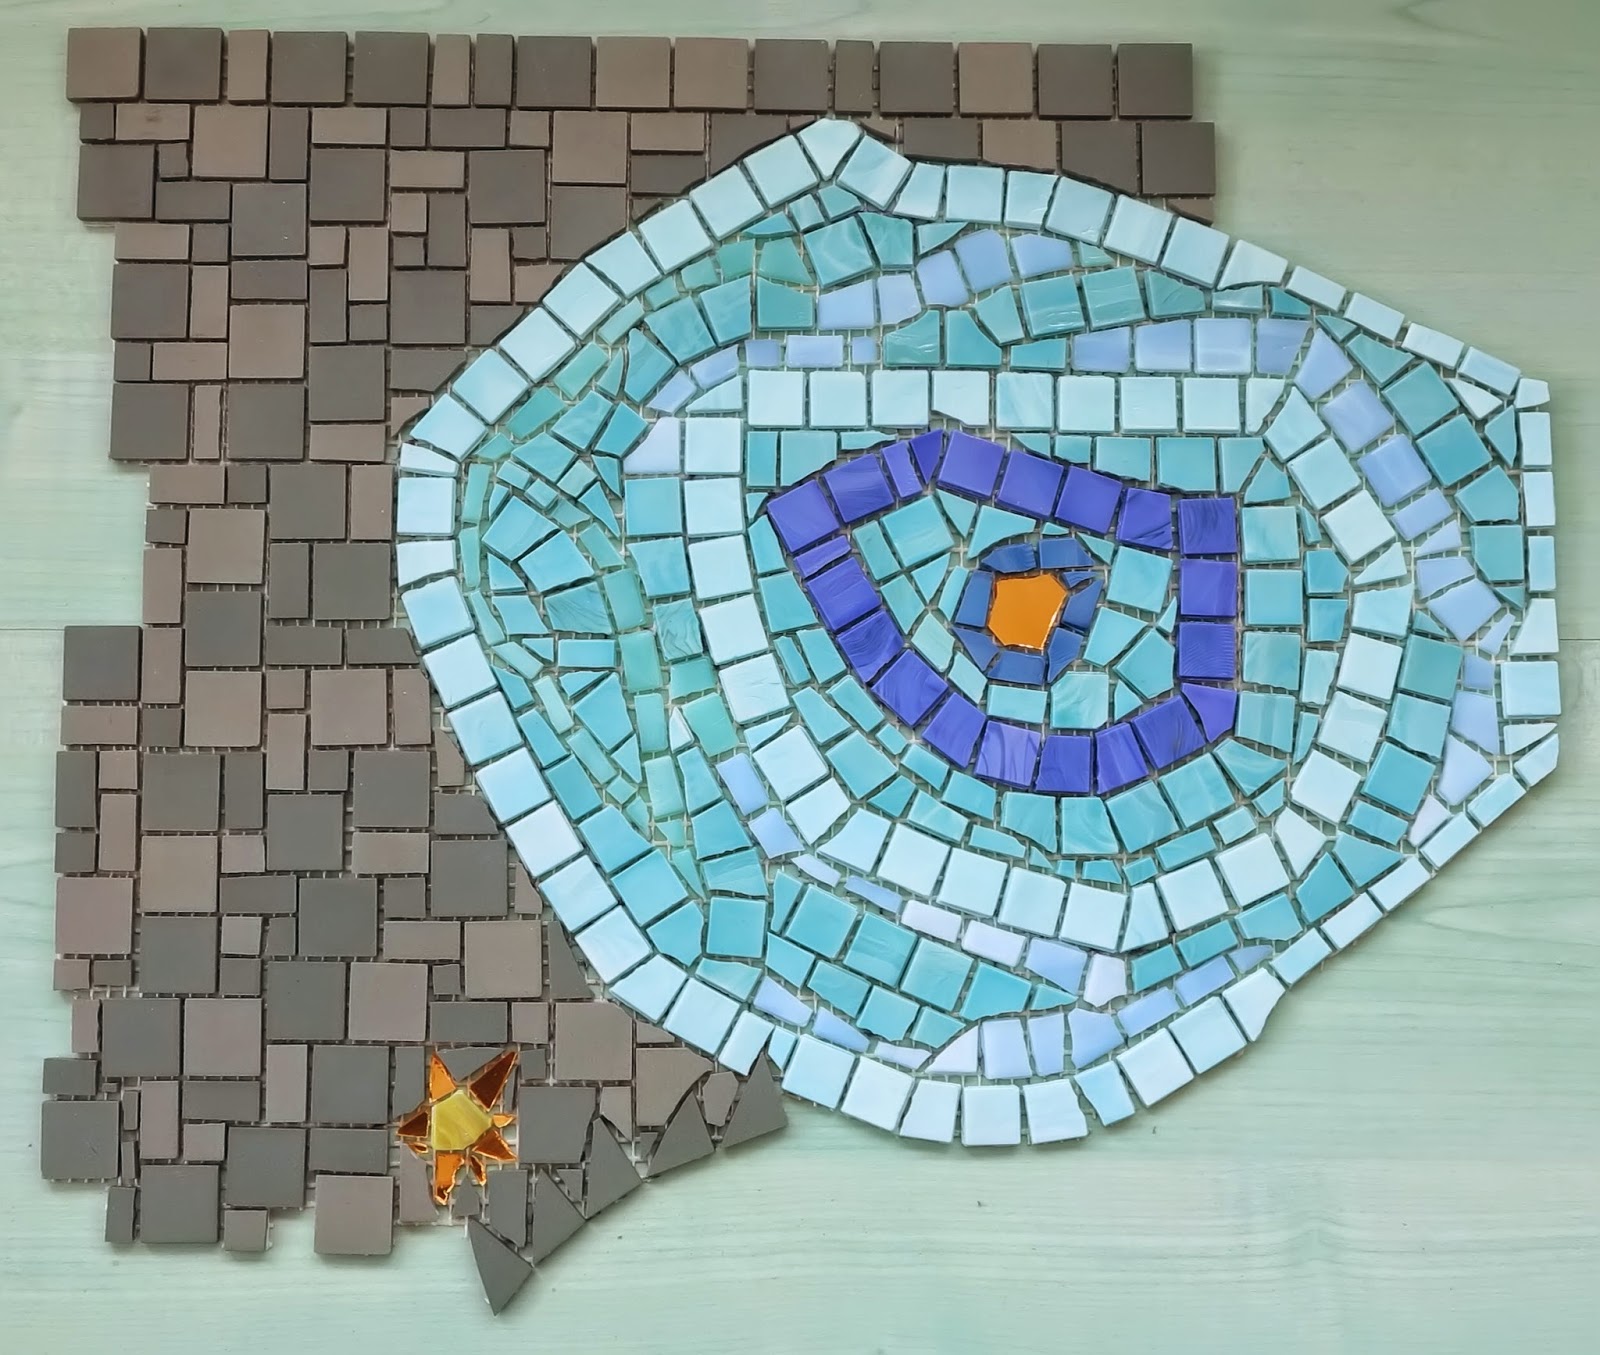
Trish says, "I used the No Days Mosaic Adhesive for the rocks,
as well as the glass and it worked perfectly!"

"It was love at first sight when I spied a mosaic window hanging
inside a (yummy :) bakery in Almonte, Ontario a few years ago.
Simple, yet beautiful, I  imagined the mosaic hanging in my garden.

Just up the street from the bakery was a neat little shop filled with
mosaics for sale. I was like a kid in candy store!  Alas, the cost of
my favorite piece was beyond my means. I was so inspired however, I
immediately decided that I would try my hand at this ancient art.


It was the perfect time to tap into my creative side. Being a sleep
deprived mom, working on a master’s thesis had left me stressed to the
max and chipping glass quickly became my escape from reality!


Fast forward several years … boy where did that time go! And what have
I actually done with my life since? Well, I've retired from my nursing
career and I have thankfully cut my stress level to a quarter of what
it was…  I am a happier and more “present” mom to our kids. Inspired
by the beauty all around me - usually my children, pets or nature - I
continue to love the challenge of capturing that beauty in my glass on
glass mosaics. I recently started a Meetup group for Mosaic-ers in my
community and am thrilled to mosaic regularly with like minded
artists! 


Wednesday, June 11, 2014

Artist Spotlight ~ Eliza from Blair House Art & Jewelry


Eliza shared a few pictures of some quick projects she creates using No Days Mosaic Adhesive film. Thanks, Eliza!
Five Boats in Blue ~ created with NO Days Mosaic Adhesive film
& scraps of stained glass on framing glass
 
These are a few of my first uses of Streuter NO-DAYS Mosaic Adhesive Film. The projects go quickly! I have just been using leftover glass pieces from stained glass projects and Cats eye glass from the jewelry I make, building on backgrounds of glass from float picture frames (I also do Photography). The Blue glass was a request from a friend who loves blue glass anything. I made this in one night. There are 5 sailboats. She didn't want it grouted and it was later copper foiled and soldered with hooks to hang on her sun porch. 
Eliza's first No Days Mosaic
I really enjoy making these. It is so easy I feel like I'm cheating but still do it. This is the first one I made. I heated it on silicone pad in the oven. When I took it out, I touched each bead with the end of a small paint brush to make sure all the pieces had contact with the film adhesive.

Eliza's "Random Glass" mosaic grouted in white
Some of the things that I've learned that may be useful to other artists:
  • I use a small paint brush tip to press all the pieces to make sure they have contact with the film after heating or taking out of the oven. 
  • Also, I first make sure the back of all pieces are flat. 
  • I've had trouble with bubbles forming in the adhesive if it's not covered with anything. To fix this, I have added embossing powder to cover the film (or later the bubbles) up and put it back in the oven or use a heat gun, heating it a little longer to attach the powder to the film. I use different colors of embossing powder, but found that if I heat it too long it all turns to copper color which I guess is the base color under the pastel colored powders.
Glass, cats' eye cabochons and a pendant in a wooden frame,
with embossing powder to fill in some of the gaps.
Gaps filled with embossing powder
I have donated some of my film to the Senior Center and worked with them making smaller pieces (4"x6" & 5"x7") using a heat gun. They have been making regular stain glass items and enjoyed being able to make some pieces quickly as their projects take a long time to make.

"It's 5 O'Clock Somewhere" (picture is upside down)
  This piece is the size of a full cooking sheet made entirely of cats eye cabochons. I placed it in a room temperature oven, then heated it @180ºF for 20 min. When done, I added embossing powder to cover bubbles and heated again for a few minutes.  I always leave room around the edges for frame or solder. After taking the pictures, I decided to move the pink bead at 6 o'clock to the 5 o' clock spot, framed it and put it in our RV window. Title = "It's 5 O'Clock Somewhere!"


Tuesday, May 20, 2014

Mosaic Artist Spotlight ~ Allan Punto of Arto Punto

Allan Punto of Arto Punto shared some photos from an installation in London, UK.
He built the mosaic on No Days Mosaic Mesh before transporting to the installation site for permanent adhesive using mortar.
8' x 2' mosaic created by Allan Punto of Arto Punto
on No Days Mosaic Mesh
"Here is a photo of the installed mosaic in London that I prepared using No Days Mosaic Mesh. The size is 8 feet by 2 feet and the tiles are Winckelman porcelain and Sicis glass. I used Rocatex Rapid Set adhesive and Grout."
Allan built the mosaic on No Days Mesh and cut it into 16 sections
to make installation easier.
"The panel was constructed in 16 sections to make transportation and installation straightforward. Prior to installation the sections were laid in situ for the client to make sure she was happy with the tones of the panel. She liked it all but decided that a softer blue would work better than the white in the big flower. This was not a problem because I had used mosaic mesh!"
Detail shot of the mosaic tiles that needed to be changed out
at the customer's request. Changing the tiles is easy by reheating
the adhesive and quickly switching out the design.

"A particular benefit for this installation of using the mosaic mesh was the easy process of changing a layer of cut tile in the big flower below to change the tone at the request of the customer. I just needed to reheat the individual pieces, remove them and replace them with a softer blue in place of white."

See more of Allan Punto's work at Arto Punto at http://www.artopunto.co/ 

Wednesday, April 16, 2014

Glass on Glass Lotus Mandala by Debbie Percelay

Debbie's mosaic based on pattern by calyxann.etsy.com

Recently, Debbie shared some pictures of the glass on glass mosaic she had been working on. Along the way, she had a few questions about different methods of heating the No Days Mosaic Adhesive. Debbie asked, "Can I put the entire piece in the oven? If so at what temp?"

Placing all the mirror and dichro dots just so...

 Yes, yes, you can! When I'm working on larger glass substrates, I put the piece in the oven at room temperature, and then set the temperature for 180º-200ºF.  While the mosaic heats up, I work on other projects around the studio/house. The adhesive goes clear and looks wet when it melts. After 10-15 minutes, I'll check back with the mosaic and test the pieces a bit using a pair of long tweezers to see if they slide easily.


"No nasty fumes? That's great! I imagine this will be much better than using my embossing gun! Should I set it straight on the oven rack?"


 Placing the mosaic straight on the rack is fine. Heating the piece in the oven gets the job done much more quickly and evenly than heating with a heat gun or embossing gun. If you're using a heat gun, you have to slowly heat the whole piece very evenly. If you don't heat a large glass substrate evenly, there's a chance of thermal shocking the glass, which results in a big crack! I have heated a larger piece with a heat gun in a pinch, but it's definitely a patience game. Using the oven (or a kiln) to heat the piece allows you to multi-task. After it's heated evenly in the oven and you remove it, you can continue to heat with your embossing tool to move pieces into place.
 
When the light reflects off of the mirror and dichro, there's tons of sparkle.

When Debbie finished her project, she shared pictures of it in the sun and in the window with backlighting. "I love it Carrie! When it's hanging in the window it's harder to see the dichro blobs and mirror, so maybe it will hang on a wall at some point. Already thinking about the next one!"

When the light is shining behind the piece, the bright, transparent colors
in the middle grab the spotlight!

Below is a video for working with No Days Mosaic Adhesive in glass on glass mosaics:

Saturday, March 15, 2014

Creating a NO Days Stepping Stone

No Days Mosaic Adhesive on Stepping Stone
Gather the materials: paver stone, No Days Mosaic Adhesive,
tweezers, scissors, heat gun, grout, glass.
Tools & Materials:
-Paving Stone from home improvement store
-No Days Mosaic Adhesive Film
-heat gun
-stained glass
-cutting tools: glass cutter, running pliers, mosaic nippers
-Morton Portable Glass Shop (or other strip cutting system)
-tweezers
-grout
-latex gloves

Approximate Time Start to Finish: 3 hours
Clean sand and debris off the surface of the paver stone.
After brushing off the paver stone of dirt and debris, cut the No Days Mosaic Adhesive to size using scissors or an exacto blade. You can overlap pieces of the adhesive film, and even use scrap and leftover adhesive film. The stepping stone pattern can be traced on the adhesive film, if you find it helps. If you want to make sure the film doesn't slide around on the stepping stone while you're placing tiles, you can prep the adhesive to the stone ahead of time. Below is a picture using an iron and the white release liner that comes in the package with the No Days Mosaic Adhesive to prep the stone with adhesive. (NOTE: If you don't let the adhesive cool before removing the release liner, it will stick to the liner and not your stepping stone!)
You can make the adhesive sheets stick to the stone by prepping
with an iron and the white release liner that comes packaged with
No Days Mosaic Adhesive.
After placing all of your tiles on the surface of the adhesive, it's time to heat set the adhesive to activate it. Using an oven is the easiest way to heat set the stone. Set the oven to 200 degrees F (93ºC) and place the stone on the rack for about 15- 20 minutes. The stone takes quite awhile to heat up, and it's important that the stone gets to 160ºF (too hot to touch) so that the adhesive bonds fully with both the stone and the tiles. You can also use a standard heat gun or embossing heat tool to heat the tiles and stone.
As soon as the mosaic cools, it's time to grout!
After the stone cools (~15 minutes), you're ready to grout. If you're teaching the stepping stone as a class, this 15 minutes is a good time to give a grouting demo and talk about the different kinds of grout available and different methods for mixing grout.
Finished stepping stones in about 3 hours!

Finished stones in the yard. This batch was done by a Girl Scout troop.


Here's a video to give you more ideas and explain the process:

Monday, February 24, 2014

Glass on Glass Mosaic Workshop with Katrina Doran

Glass on glass : Mosaic windows
with Katrina Doran

Glass on Glass Mosaic using No Days Mosaic Adhesive

 If you've been looking for instruction in using No Days Mosaic Adhesive film, then you may want to check out this workshop with Mosaic Artist & Instructor Katrina Doran at the Creative Arts Center of Dallas on Saturday, March 15, 2014 – Sunday, March 16, 2014 beginning at 10:00am.

For more information, head over to Katrina's web page.

Creative Arts Center of Dallas (map)
2360 Laughlin Drive
Dallas, TX 75228
USA