Welcome to the No Days blog, where we share our product videos, project ideas and pictures from Road Show and Trade Show events. Friend us on Facebook, Pin us on Pinterest, and Follow Us with Google Friend Connect.
Interested in becoming a NO Days Featured Artist?
Interested in becoming a NO Days Featured Artist?
Want to share your artwork made using NO Days products with the world? We want to help you promote your work! We love seeing the various ways artists are using NO Days products! We share our Featured Artist spotlight with our newsletter subscribers, our Facebook friends and fans, on our Featured Artist Page and right here on our blog, linking back to your website.
Simply send an email to info@nodaysadhesives.com with the subject: Featured Artist. Be sure to include your name, email address, and website (if you have one) along with a brief bio and pictures of yourself and your artwork made with NO Days Products. Not sure what to include in a bio? Tell us how you became interested in playing with glass or crafts. How about where you get your inspiration? Oh! And don't forget to tell us why you love using NO Days!
Gather the materials: paver stone, No Days Mosaic Adhesive,
tweezers, scissors, heat gun, grout, glass.
Tools & Materials:
-Paving Stone from home improvement store
-No Days Mosaic Adhesive Film
-heat gun
-stained glass
-cutting tools: glass cutter, running pliers, mosaic nippers
-Morton Portable Glass Shop (or other strip cutting system)
-tweezers
-grout
-latex gloves
Approximate Time Start to Finish: 3 hours
Clean sand and debris off the surface of the paver stone.
After brushing off the paver stone of dirt and debris, cut the No Days Mosaic Adhesive to size using scissors or an exacto blade. You can overlap pieces of the adhesive film, and even use scrap and leftover adhesive film. The stepping stone pattern can be traced on the adhesive film, if you find it helps. If you want to make sure the film doesn't slide around on the stepping stone while you're placing tiles, you can prep the adhesive to the stone ahead of time. Below is a picture using an iron and the white release liner that comes in the package with the No Days Mosaic Adhesive to prep the stone with adhesive. (NOTE: If you don't let the adhesive cool before removing the release liner, it will stick to the liner and not your stepping stone!)
You can make the adhesive sheets stick to the stone by prepping
with an iron and the white release liner that comes packaged with
No Days Mosaic Adhesive.
After placing all of your tiles on the surface of the adhesive, it's time to heat set the adhesive to activate it. Using an oven is the easiest way to heat set the stone. Set the oven to 200 degrees F (93ºC) and place the stone on the rack for about 15- 20 minutes. The stone takes quite awhile to heat up, and it's important that the stone gets to 160ºF (too hot to touch) so that the adhesive bonds fully with both the stone and the tiles. You can also use a standard heat gun or embossing heat tool to heat the tiles and stone.
As soon as the mosaic cools, it's time to grout!
After the stone cools (~15 minutes), you're ready to grout. If you're teaching the stepping stone as a class, this 15 minutes is a good time to give a grouting demo and talk about the different kinds of grout available and different methods for mixing grout.
Finished stepping stones in about 3 hours!
Finished stones in the yard. This batch was done by a Girl Scout troop.
Here's a video to give you more ideas and explain the process:
sanded grout : container to mix it in, water, gloves, paper towels (You can use No Days Groutless Mosaic Adhesive to skip this step, but you may need to use a different adhesive for gluing the bail, or come up with a creative jig for holding the clip.)
To make a No Days Mosaic Night Light, start by cutting a piece of glass for the base of your mosaic. I’m using a Toyo circle cutter with Spectrum’s System 96 clear glass, which cuts and breaks easily leaving a nice flat surface for building your mosaic on. Set the circle cutter to the radius of the circle you want to cut & center it on your glass. Make sure that there are no obstacles in the way of the bar before pressing down and scoring the glass. When you return to the start of the score, stop turning the cutter head. You only want to score once. Square off your circle, removing any excess glass.
Next, place the breaking button from the Morton Safety Break System under the scoreline on the glass and use the running tool to push down on top of the line. Make sure you’re holding the running tool perpendicular to your score. Start your score in a corner so there’s less chance of the score running to the edge of your glass. Press with gentle but firm pressure until you see a score start to run. Rotate your glass, placing the edge of the run on top of the button and press down with the running tool again. Repeat until your score line meets itself at the other side of the circle.
Now, score some release cuts from the edge of the glass almost to the circle score lines. Do this on four sides of the glass, then gently break the scores.
After cutting the glass base, it’s time to get on the grinder and soften up the sharp edges of the glass so that no one gets cut picking up the night light. Using a glass grinder with water, shape the glass if needed and remove sharp edges by grinding on an angle. If you're unsure of how to do this, find a local stained glass shop and they'll show you what you need to do.
Make sure to wear safety glasses while grinding and prevent glass bits from flying at your face with a splash guard.
Dry the base piece of glass and cut a piece of No Days Mosaic Adhesive the size of your glass base.
Nip various bits of glass or follow a pattern and cover your glass substrate (base). When you've got it filled in, leaving some room for grout lines, you're ready to heat set the No Days Mosaic Adhesive.
Working on a heatproof surface, use a standard heat gun to heat the mosaic from 8-10” away, which helps to prevent the glass pieces from being blown away by the force of the hot air. As the adhesive liquefies, some of the mosaic bits may move around. While the mosaic is still hot, use your tweezers to nudge the pieces into place. If you need to add extra pieces, make sure to heat them so that they firmly adhere. Then, let the mosaic cool and assemble your grouting station.
Gather grout, a mixing cup, water, and gloves. When your mosaic has cooled, it's ready to grout. Mix unsanded grout with a very little bit of water, adding more until you get to the consistency of toothpaste or peanut butter. Wipe the grout across the surface of your mosaic so that it gets in between all of the tiles. Pull it around the edges of the mosaic, too. Scrape the excess grout off of the surface of the mosaic, then let it sit for about 10 minutes. Using a damp sponge, wipe across the surface of the mosaic to remove the grout from on top of the tiles turning the sponge to a clean side with each pass. Again, let the mosaic sit for 10 minutes, then buff with a dry paper towel or rag to remove any haze.
Wait another 10 minutes before gluing the night light clip to the backside of your mosaic. Cut a small length of No Days Mosaic Adhesive. Place a few layers of the adhesive film on the back of the night light where you want to attach the clip.
Working on the heatproof surface, turn the heat gun on and have tweezers out to hold onto the clip while heating it. It’s important to heat the glass base long enough to get it hot to the touch in order to ensure a good bond. Don’t worry about your mosaic pieces falling out. The grout and adhesive should hold them firmly in place while you heat. Let your mosaic cool down, and then check to see that the clip is firmly attached. If it pulls off, then it wasn’t heated long enough. Reheat and try again, pushing excess adhesive out from between the glass base and clip.
Attach your nightlight hardware together securely, then plug it in, turn it on and enjoy!
For more project ideas and instructional videos, visit streuter.com.
For ordering information or help with questions, email info@streuter.com.
With the holidays around the corner, you may be looking for projects to make as gifts. The HoneyDoo Zuper Glue Snowflake Ornament is a quick project that doesn't take much time or glass, but gets lots of oohs and aahs when the wrapping paper comes off!
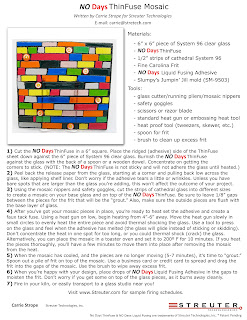
Creating fused glass mosaics is a breeze using No Days ThinFuse. When you heat set the adhesive to hold the glass pieces in place, you create a faux tack fuse with a super strong bond that allows you to "frout" (grouting with frit) your piece without waiting! If the glass pieces set up but they're not where you want them, simply re-heat to re-position the piece.
Looking for a quick gift idea for an upcoming occasion? What grandparent doesn't love receiving homemade gifts from their grandchildren? Here's a great project that's both quick and easy, finishing in 1 to 2 hours, depending upon your style.
No Days Q Stik Mosaic Adhesive from Streuter Technologies is a heat set
adhesive with an easy peel backing that reveals an industrial strength,
pressure sensitive adhesive, ideal for permanently mounting mosaic
design elements to interior surfaces, from picture frames, mirrors,
mirror frames, and furniture, as well as wall spaces.
Streuter’s
heat set adhesive offers the convenience of being able to quickly cure
tiles in place for immediate grouting, as well as the freedom of being
able to remove or reposition tiles easily if you change your mind or the
design. The thickness of the heat set adhesive allows it to fully
conform even around contours of thick, porous or uneven tiles creating a
strong bond. The addition of the pressure sensitive adhesive allows for
even more flexibility in using the heat set adhesive, including working
on glass surfaces such as mirror without worry of thermal shock, or the
ability to vertically mount tile without using silcone, thinset or mortar.
Using
NO Days Mosaic Adhesive to create glass on glass mosaics is a quick and
easy way to finish a stained glass window without having to worry about
lead or solder.
Begin by cutting all of your glass pieces to fit your pattern.
Place
the NO Days Mosaic Adhesive on your glass substrate, cut to size and
begin building your mosaic. When all of your glass pieces are in place,
you’re ready to heat set the adhesive.