Interested in becoming a NO Days Featured Artist?

Interested in becoming a NO Days Featured Artist?


Want to share your artwork made using NO Days products with the world? We want to help you promote your work! We love seeing the various ways artists are using NO Days products! We share our Featured Artist spotlight with our newsletter subscribers, our Facebook friends and fans, on our Featured Artist Page and right here on our blog, linking back to your website.

Simply send an email to info@nodaysadhesives.com with the subject: Featured Artist. Be sure to include your name, email address, and website (if you have one) along with a brief bio and pictures of yourself and your artwork made with NO Days Products. Not sure what to include in a bio? Tell us how you became interested in playing with glass or crafts. How about where you get your inspiration? Oh! And don't forget to tell us why you love using NO Days!
Showing posts with label demos. Show all posts

Friday, November 29, 2013

Oops! Now what?!? Working with frit and No Days Liquid Fusing Adhesive

"Embroidered Dogwood" fused glass plate created with frit,
Glassline paints and No Days Liquid Fusing Adhesive.
The creation of this plate is an epic tale. So grab your preferred beverage, sit back and enjoy the ride!

Clear fusible glass base with painted trace lines done with
Glassline paints.

In the beginning, there was a circle of clear glass and some glassline paints to outline the design...I've been working on a series of floral themed platters. Some of them are very realistic looking, but mostly, I lean towards abstract and lots of color. My aim for this particular plate was to make it look geometric with a sense of needlework. After tracing the outlines of my design from a template to the clear glass base and letting the paints dry (10-15 minutes), I was ready to add details and color with various frits.

Building frit design from the center outward over the
dried paints. Frit is held firmly in place with
No Days Liquid Fusing Adhesive.
When I'm using frits, the size grain that I use depends upon the outcome I'm going for. When adding fine detail lines, I use fine frit (size F2 in System 96 or size 01 in Bullseye). The fine frit allows me to create highly detailed imagery. It is also easy to sculpt with the No Days Liquid Fusing Adhesive. If I have larger areas of my design to fill in, I'll switch to medium or coarse frit sizes and often blend colors, as well as mixing opals with cathedrals. Once I've got my design established, I find a good starting point in the center-ish. This makes it easier to work on your piece without brushing your arms across your design.

Detailed frit designs are added in a circular motion building outward.
I lay down a bit of No Days Liquid Fusing Adhesive, then cover it with frits. I sculpt the frits into the shape I want them to be. It's easiest to work from the inside out (in this case).  By starting in one spot and then working next to it, you've got a wall of frit to support each new addition. I decided to experiment with adding some coarse frit accents in areas (to mimic the knotted stitches in embroidery), and then covering them with fine frit. Here, we're viewing the plate from what will be the front side when the plate is finished. It's helpful to have a mirror to work on, then you can see what the front side of the plate looks like as you're working without having to lift the plate overhead.

Checking the progress, looking up at the underside.
If you build on a mirror, you can check your progress as you work.
Although there are no trace lines outside of the flower in the center, I wanted to continue building in a pattern around the edges. Each new color got placed and sculpted until I reached the edge...

The design is nearly finished! And then...
Super close to being finished, and can you believe that it still hasn't occurred to me that I'm working with "enemies"? Wait, what?!?

A picture of the finished frit design before firing in the kiln to
burn off the adhesive and save my design...hopefully.
Yea! It's all finished, and about this time I realize that I've used a piece of 90 COE clear base with 96 COE frits. This is one of those projects that sat in my studio for a few months after being painted before I was able to get to it and add frits. A great lesson in keeping an extremely well organized studio if you plan on firing glass in the kiln. Either stick with one kind of compatible glass, or segregate your pieces from step one! 
So, now I'm left with a beautiful mosaic platter. I could have left it glued together as a flat piece and the No Days Liquid Fusing Adhesive would keep it glued together for good. But, that's not the intention I had when creating this plate, so it's time to trouble shoot. And, admittedly, that's one of the great pulls that fused glass holds over me. I love problem solving and understanding the whys behind the process. So, time to experiment...

First attempt to burn off the adhesive...obviously failed.
Getting to know No Days... The picture above shows the results of my poor plate going into the kiln after the first attempt at burning off the adhesive. 

The firing schedule follows:
300ºF per hour600ºF1.30
off

NOTE: All following firing schedules will have the above layout, with the first column being degrees per hour (in ºF), the second column is the target temperature in ºF, and the third column is the hold time: hours.minutes).

Obviously the adhesive did not fully burn out. The frit is still stuck firmly to the plate and has not dropped to the kiln shelf. Looks "carmelized." Yum.

Detail of caramelized glass...Frit is still stuck in place!

Okay...so the adhesive really holds! Let's see what a second burnout attempt looks like...

Second burnout attempt.

I left the kiln vented for the entire firing so I could observe what was happening. [Also, my studio is in the garage next to a window that I can open for ventilation. I always recommend trying to keep your kiln in a space that is not a living space. That way anything that burns out while firing (binders, adhesives, fiber papers, etc.) will not stink up your house.]

At 800ºF, there was visible smoking.

At 920ºF, there is no visible smoke, but I could smell the adhesive burning off and see brown on the kiln shelf.

After 45 minutes at hold temp (1000ºF), I could no longer see any carbon burnout on the piece or kiln shelf. The frit has not dropped from the glass to the shelf.
  
After the firing was complete, the adhesive in the center of the plate had obviously not burned off. The frit on the edges of the plate can be tapped off of the glass. (This makes me want to do another experiment to see how well the frit holds on to the plate after burning off the adhesive...that's for another post...)

[NOTE: The plate is placed directly on a kiln-washed shelf with no fire paper. The clear glass on top of all the frit is preventing the adhesive from burning out in the center. It would be much quicker to burn off the adhesive if the glass base were on the bottom and the frit on top. However, I need to get the adhesive to burn out and release my frit onto the kiln shelf, so I can replace the clear glass with compatible System 96 glass! This means that it's taking longer for me to burn out the adhesive than it would under normal circumstances (frit on top of sheet glass in the kiln).]

Second attempt firing schedule:
300ºF per hour1000ºF1.30
off


The adhesive has fully burned off after 4.5 hours in the kiln and
three successive low temperature firings.
At this point, I decided to try the second firing schedule again. Why? Well, I don't want to raise my top temperature any further. If I creep up towards 1100ºF, my glass base will start to distort and slump into the frit, and my hope is to salvage that piece to create a different dogwood plate. I figured that another long hold at 1000ºF will help to get that adhesive out from under the glass in the center of the plate. Guess what?!?  After the third burnout attempt, SUCCESS! Full burnout of adhesive. The frit is still stuck to the plate in places, but can be tapped off, mostly.

Third attempt at burnout firing schedule:

300ºF per hour1000ºF1.30
off


The frit that has been tapped off of the clear glass and salvaged on the kiln shelf.

The frit design has been saved on my shelf so I can now prep a clear piece of System 96 glass to cap it with!
This is the frit that was still hanging on the clear piece of glass!
Can you believe the adhesive is still working after all of that?!?
I wasn't able to tap off all of the frit. The adhesive has fully burnt out, but the frit is still sticking together. It did come off of the plate when I wiped it clean, but I just trashed the bits that didn't transfer to the shelf. Below, you can see where I added additional frit to the design to fill in the gaps (aiming for the magical 6mm thickness that glass wants to be at a full fuse).

Take two...(or is it four?)...I've added a clear sheet of Spectrum to
cap the frit that was left on my kiln shelf.


I prepped another sheet of glass, this time using the proper glass: Spectrum clear with Glassline paints.
Full fuse number one...success-ish!
After a full fuse, the plate has a few divots (not to be confused with devit = devitrification; because there's none of that), plus I want to add more depth.

Time to add more depth and detail to the top side of this design
with coarse frits and a No Days Powder Wafer.
Plus, clear frit to even out the thickness of the glass.
There are areas where the thickness of the glass wasn't 1/4," so I added some clear frit to fill in the divots. Also, I wanted more of those embroidery "French knot stitches" and added bits of coarse frit for detail. Then, because the middle was still lacking, I decided to add a No Days Powder Wafer. Uh...what's that? It's still a secret! But, watch for details in the next few months. Oh! And you can sign up for Jacqui Bush's Vegas class to get a jump start on the technique, too!

I'm on a roll! Time to get these projects fired and finished!
For the finishing full fuse, I loaded the kiln with two other projects I've been waiting to fire.
The plate on the lower left is ready for it's first firing. It was also built entirely of frit on clear with No Days Liquid Fusing Adhesive. 90 COE exclusively... I did not have to fire it several times to facilitate full burnout of the adhesive because the clear piece of glass is on the bottom of the frit. This means the adhesive can escape straight up and out of the piece, unlike the previous pictures of the dogwood plate where the adhesive had to escape beneath the clear glass to the edges before burning off.
Also, notice the addition to my kiln shelf of fire paper. Firing on fire paper ensures that any air between the kiln shelf and the plate has a chance to escape, meaning that I get no big, unexpected bubbles bursting through the top of my plates!

Ahhh! What a feeling! Finally finished, well, except for the slump.

Tada! Full fused again and ready to slump. This particular mold is the Round Rippled Drop Out Mold from Slumpy's. I've been really into using drop-out molds against the kiln shelf to make nice flat-bottomed plates. Flat-bottomed plates make my slumping world go 'round...or something like that ;)

Post-slump firing in a drop out mold from Slumpy's.


Wow! You made it all the way to the bottom and the end of my saga! Hope you were able to follow along without too much confusion. However, if you've got questions, I'd love to hear them and see if I can't answer them, as well :) Leave a comment on the blog and I'll do my best to answer!

Tuesday, May 14, 2013

The Vinery Stained Glass Shop Road Show ~ Madison, WI

Denny gave me a quick tour of his new location.
He's got this Saguaro skeleton that's been with him for years.
Denny's new location is HUGE! He's been there for 6 months and it still smells brand new. He's got tons of glass on display, as well as finished projects. I got the grand tour as soon as I arrived.
Next to the front door of the store
There's plenty of room to walk around and everywhere you look there's eye candy. The store is divided into areas for make and take fused glass pendants, lampworking, stained glass, mosaic and fused glass classes.
He's also got his very first stained glass piece that he made by teaching himself
from a book when he was 24...just a few years ago. He's also got his very own Peter McGrain portrait looking over his precious.
Denny planned a full day with his Customer Appreciation Event occurring at the same time as the No days Road Show. The first 150 customers through the door got swag bags. There was a full demo schedule for glass cutting, the Morton System, bottle cutters, flameworking, foil repair, fusing ideas, programming your kiln, and of course, No Days adhesives!

Thursday, April 18, 2013

2013 American Mosaic Summit ~ Tacoma, WA


 The 2013 American Mosaic Summit has come to a close. We had a blast meeting new people, greeting old friends, finding new materials, sharing new techniques, and above all seeing the multitude of gorgeous mosaics!

Streuter Technologies' No Days Instructor Carrie Strope was able to team up with Susan Gamble of Santa Theresa Tileworks and Steve Shupper of Glass Accessories International to offer 2 four hour workshops titled, "Mixing It Up and Making It Great: Expanding Your Creativity with New Products and Technology." 

The workshops were open to all skill levels and focused on expanding the creative approach and mosaic materials palette, trying new tools and increasing knowledge of mounting methods and products for small and large scale, indoors and out-of-door projects.

 Students designed impromptu mosaics using Spectrum glass, Van Gogh glass, and thin, high fired, frost-resistant Skinny Tiles made by Santa Theresa Tile Works on wedi board with No Days Groutless Mosaic Adhesive, No Days Q Stik, or No Days Mesh.

Susan Gamble offered inspiration for design with a colorful presentation featuring various installations using Santa Theresa tiles and No Days adhesives. Steve Shupper gave a thorough overview of cutting glass and tiles using Toyo cutters and the Morton Portable Glass Shop to make strips, squares, triangles, diamonds and more. Carrie Strope finished by giving a quick demo of using Streuter's heat set adhesives and how to choose the proper adhesive for the job.

Not only did students leave with a nearly completed mosaic (we didn't grout in class), they received a special treat, as well! Steve handed each student the new Toyo pistol grip cutters with tap wheel (or vibrational) heads. Each student also went home with a roll of No Days Groutless Mosaic Adhesive, and samples of No Days Q Stik and Mesh.

We hope that everyone enjoyed themselves as much as we did and can't wait to see pictures of finished projects! Thanks to everyone that took the class or stopped by the booth in the vendor marketplace. We can't wait for next year!

Wednesday, August 1, 2012

No Days Road Show - Norwood Custom Glass, Cincinnati, Ohio

Norwood Custom Glass specializes in creating custom stained glass windows,
etching, carving and beveling glass (including mirror), and fused and painted glass.
This is Norwood Custom Glass, located just on the North side of Cincinnati, Ohio. I absolutely love the Art Deco styling of the building. I visited Norwood Custom Glass in June for a No Days Road Show and was amazed by the studio set-up. There's such a large inventory of glass, patterns, tools and materials!

Monday, July 2, 2012

No Days Road Show - The Glass Galleria - St. Louis, MO

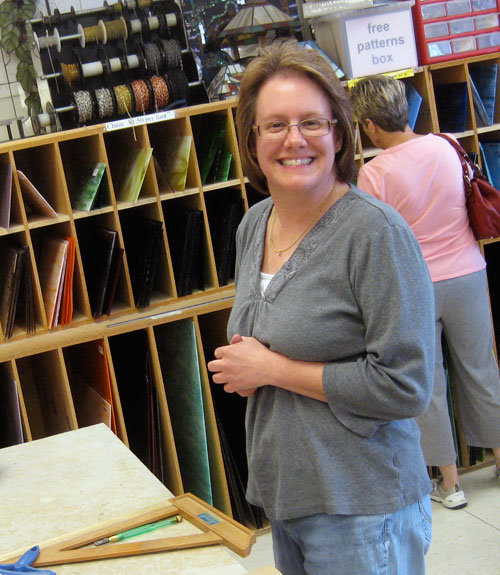
Glass Galleria owner Ann Novotny ~ all smiles!
Streuter visited The Glass Galleria in Saint Louis, Missouri the weekend of April 28th, 2012 for a No Days Road Show and Groutless Mosaic Adhesive class!
Students sampling the different styles of Toyo cutters available

No Days Instructor Carrie Strope Sohayda opened with demos of the different mosaic adhesives before diving in and having students start cutting glass for their Groutless Coasters. If you've ever wanted to try a different style of cutter or need some tips on cutting glass, then you need to get to a Road Show! Carrie had Toyo's complete line of cutters available for practicing with and explained the differences between the designs and cutting heads.

Thursday, April 5, 2012

2012 Glass Craft & Bead Expo - Las Vegas

Streuter's No Days booth on the Expo Floor

Streuter Technologies just returned from yet another year at the Las Vegas Glass Craft & Bead Expo at the South Point Hotel and Casino.
Sharon & Connie in the Stained Glass Station

We saw many new faces and also many friends from years past. There was a great turnout to the show this year, and our new line of products were well received!

Leigh Adams in the Mosaic Station
Did we nab your picture in the booth?  Keep reading to find out!


Sunday, March 11, 2012

No Days at SAMA 2012 - Lexington, Kentucky

Carrie waking up with some coffee

The Society of American Mosaic Artists annual conference took place in Lexington, Kentucky this year, and No Days made an appearance on the marketplace floor in what we called "the glass corner."
No Days Groutless Mosaic Adhesive with "Skinny Tiles" from Santa Theresa Tile Works and
smalti from the Institute of Mosaic Art.